7 Layer Taco Dip (V, DF, GF)

And just like that it’s February! For self love month, I usually opt for pink treats, but this year I decided to lean into the Superbowl snack category and y’all are going to LOVE this recipe. Not only is it easy to throw together, but it’s so damn delicious and will fit most people’s dietary restrictions. Happy snacking!


7 Layer Taco Dip (V, DF, GF)
 
Prep time
Total time
 
Author:
Serves: 4-6
Ingredients
  • 8 oz tub dairy-free cream cheese (Miyoko’s)
  • ½ tsp taco or chili seasoning
  • ½ 16 oz can vegan refried black beans (Siete)
  • 2 large avocados, mashed
  • Squeeze of a lime
  • 2 cups of spinach or leafy green,
  • 1 tomato, diced
  • ½ cup olives, sliced
  • 1 cup vegan cheddar cheese (Violife)
  • Optional: ¼ cup nacho sliced jalapeños
Instructions
  1. Get out an 8x6 (or similar size) glass container to make the dip in and set aside.
  2. In a small bowl, mix the cream cheese and taco seasoning together and then spread evenly on the bottom of the container with a spatula.
  3. Next, open the refried beans and spread them evenly on top of the cream cheese layer.
  4. In another small bowl, mash up the avocado and a squeeze of lime. Then layer over the refried beans.
  5. Now, sprinkle the spinach evenly over the dip followed by the tomatoes, olives, jalapeños + vegan cheese.
  6. Serve with your favorite tortilla chips and veggies. Enjoy! Store leftovers in a covered container for up to 4 days.


Don’t forget to tag me if you make it 🙂

With Health + Happiness Always,

Jax

PS – Looking to show your mind + body some self love? Check out the Little Adapts By Jax App for 7 days free + all the movement and mindfulness you’ll need to feel rejuvenated + restored this month!

Apple Pie Cookies (V, DF, GF)


Happy Fall Y’all! If you’ve tried my banana breakfast cookies, then you’ll LOVE these apple pie cookies. They are just as delicious and nutritious, but are packed with all the fall feels you are looking for. As always, they are the perfect breakfast cookie, snack or dessert and it’s another recipe that your kids will love to make with you and eat!

Apple Pie Cookies
 
Author:
Ingredients
Instructions
  1. Preheat the oven to 350 degrees F. Place the water + ground flax seed into a small bowl + whisk. Then let it sit for 5 minutes.
  2. In a large bowl, mix wet ingredients together: apple sauce, almond butter, flax egg + maple syrup.
  3. Then add in oats, cinnamon, and baking powder until well combined.
  4. Fold in apples and pecans.
  5. Using a spoon or ice cream scooper, place batter onto baking tray.
  6. Bake for about 15 to 17 minutes until edges are browned. Make sure to rotate trays halfway!
  7. Cool on baking rack for 10 minutes + enjoy! Keep in the fridge for up to 2 weeks.


Don’t forget to tag me if you make them 🙂

With Health + Happiness Always,

Jax

Vegan Milky Ways (GF, DF, V)

I created this recipe back in October 2021 because I had been wanting to “little adapt” my favorite candy bar – the Milky Way – for a long time. However, I only shared it on IG when it really needed to live on my website so more beautiful humans like you can find it 🙂 Let me tell you – THIS RECIPE IS FIRE and it’s here just in time for Halloween! Happy treatin’ yo’self this month!

Vegan Milky Ways (GF, DF, V)
 
Prep time
Cook time
Total time
 
Author:
Serves: 1
Ingredients
Chocolate Layer
Nougat
Caramel
Instructions
  1. Line 8 x 6 pan w/ parchment paper, place chocolate chips and coconut oil in a glass measuring cup. Heat the chocolate in 30 sec increments in a microwave and stir until fully melted.
  2. Pour half of the chocolate on the bottom of the pan, evenly, and place the pan in the freezer. Set rest aside.
  3. Prepare nougat by adding marshmallows and water to a microwave bowl. Heat for 30 sec, add the cacao powder and stir softened marshmallows. Continue to heat in 30 sec increments until you have a creamy light brown marshmallow consistency.
  4. Take the pan out of the fridge and spread nougat on top of the chocolate layer with a spatula. Leave room on sides for the top layer of chocolate to run over and seal edges. Place back in the freezer while you make the caramel layer.
  5. Heat a pan on low heat and add almond butter, maple syrup and vanilla extract. Continuously mix with a spatula until all ingredients are combined.
  6. Take the pan out of the freezer and add caramel layer. Again, leave room on the sides. Place the pan back in the freezer and leave for 3-5 minutes.
  7. Finally, reheat the remaining chocolate and coconut oil and take the pan out of the freezer a final time. Pour melted chocolate over the top and fill in the sides.
  8. Place the pan in the fridge for 10-15 minutes to let the chocolate harden. Take out of the fridge and cut into slices. Enjoy!

Love, Jax

PS – Looking to feel fit + fabulous this fall? Sign up for 7 days FREE of the Little Adapts By Jax App and start utilizing the weekly schedule for a svelte, sculpted you in no time!

Frozen 4th of July Coconut Yogurt Bark (GF, DF, V)

Happy July! Now that it’s HOT, it’s time for a cooling treat to celebrate this country’s independence day. I eat coconut yogurt bowls on the regular, but this recipe takes it up a notch and makes me feel like I’m eating delicious frozen yogurt so it’s perfect for a mid afternoon pick-me-up or dessert. The best part? It can be whipped up in just a few minutes and is the perfect easy and vegan BBQ treat that your friends and family will LOVE. Don’t forget to tag me @littleadaptsbyjax if you whip this up 🙂

Frozen 4th of July Coconut Yogurt Bark
 
Prep time
Total time
 
Author:
Serves: 15-20 pieces
Ingredients
Instructions
  1. Place parchment paper onto a small baking sheet.
  2. Add coconut yogurt and maple syrup to a bowl and whisk until well combined.
  3. Pour mixture onto the parchment paper in the pan and make sure it is spread out evenly and not too thick.
  4. Evenly distribute add-ins by sprinkling over the coconut mixture.
  5. Store in the freezer for 1-2 hours to let it solidify. Once solid, take out of the freezer and place the parchment paper on a large cutting board. Cut up into pieces and enjoy! (You may want to let it thaw for a few minutes before serving.)
  6. Store in the freezer in an airtight container to prevent freezer burn for up to 3 months.


Love, Jax

PS – Looking to detox before the summer? Sign up for my FREE 3 Day Real Food Detox Guide here so you can start feeling your best NOW!

Sea Salt Cookie Dough Balls (DF, GF, V)

Happy April and you can feel spring is in the air! I’ve been living off these energy balls and the best part is that they taste EXACTLY like cookie dough. Plus, they are packed with healthy fats, fiber, protein and a little bit of sweetness to curb your sweet tooth. They are the perfect for pre or post workout, snack, or healthy treat. You can even bring them to the holidays for a healthy dessert and I promise your guests will LOVE them!

Sea Salt Cookie Dough Balls (DF, GF, V)
 
Prep time
Total time
 
Author:
Serves: 20 balls
Ingredients
Instructions
  1. Add all ingredients into a large bowl and mix with a spatula.
  2. Once well combined, roll into small balls about the size of a golf ball.
  3. Store in an airtight container in the fridge for 2 weeks or the freezer for up to a month (if they even last you that long). Enjoy!


Love, Jax

PS – Looking to detox before the summer? Sign up for my FREE 3 Day Real Food Detox Guide here so you can start feeling your best NOW!

Peppermint Hot Chocolate (DF, GF, V)

As a kid, I’ve always loved hot chocolate (and have been craving it like crazy this pregnancy!) However, with a dairy allergy and decreasing my sugar intake these days, there aren’t many hot chocolate brands on the market that meet the “little adapts” standards. When this happens, I go into my kitchen and recreate it. This hot chocolate only takes about 10-15 minutes to make, and I promise it will bring back all of your winter, childhood memories with its peppermint twist!

Peppermint Hot Chocolate (DF, GF, V)
 
Cook time
Total time
 
Author:
Serves: 1
Ingredients
Instructions
  1. Pour dairy free milk into a small pot and warm on medium-low heat.
  2. After a few minutes, add in unsweetened cacao powder + coconut sugar. Use a whisk to combine the ingredients as it continues to heat up until it is one consistent color and there are no clumps in the beverage. Feel free to taste test and add more cacao powder or coconut sugar if you want a more sweet, chocolate flavor.
  3. Finally, add in the peppermint and continue to whisk for another minute. Feel free to taste one last time to make sure it’s up to your liking.
  4. Add your toppings and enjoy!

Happy snacking and happy holidays! Don’t forget to tag me if you make it! 🙂

With Health + Happiness Always,
Jax

No Bake PSL Bites (GF, DF)

It’s pumpkin season, baby! I wanted to spice up my snack and dessert options so I gave these a whirl and OMG. They are everything I could have dreamed of and more – PSL vibes all the way. All you need is a bowl, a spatula and some pumpkin pie spice (because there is nothing worse than opening a full can of pumpkin purée for just a tbsp!) Happy October!

No Bake PSL Bites
 
Prep time
Cook time
Total time
 
Serves: 24 balls
Instructions
  1. Add all ingredients into a large bowl and mix with a spatula.
  2. Once well combined, roll into small balls about the size of a golf ball.
  3. Store in an airtight container in the fridge for 2 weeks or the freezer for up to a month (if they even last you that long). Enjoy!


Hope you enjoy this recipe as much as we do!

With Health + Happiness Always,
Jax

PS – Have you been waiting for a sign to join the Little Adapts By Jax app? My ONLY sale of the year is happening right now and you can use code TENSALE for 7 days FREE and $10 per month for the NEXT YEAR!

Banana Oat Muffins (DF, GF, V, NF)

This was one of my favorite postpartum breakfast muffins as the ingredients were supportive for a breastfeeding mom! However, it has turned into a great breakfast option for myself and now my 1 year old daughter, especially if it’s paired with a nut butter and a side of berries. This makes it a complete meal filled with lot of nutrients and keeps you satisfied until lunch!

Banana Oat Muffins (DF, GF, V, NF)
 
Prep time
Cook time
Total time
 
Serves: 12 muffins
Ingredients
Instructions
  1. Preheat the oven to 350 degrees F and line the muffin tin with liners.
  2. In a medium bowl, mash bananas and add eggs, coconut sugar, coconut oil + vanilla extract and mix.
  3. Add in the dry ingredients except pecans and chocolate chips and stir until well combined. Fold in chocolate chips.
  4. Fill each muffin about ¾ of the way full and then top each with a pecan and a few chocolate chips.
  5. Bake for 20 minutes (until a toothpick comes out clean).
  6. Let them cool on a baking rack for 10 minutes and enjoy! Store in an airtight container in the fridge for up to a week or freeze for up to 3 months.


Hope you and your babies enjoy this recipe as much as we do!

With Health + Happiness Always,
Jax

PS – Struggling with your summer workout routine? Try out the Little Adapts By Jax App for 7 days FREE and a chance to finally create that daily movement routine your body has been craving!

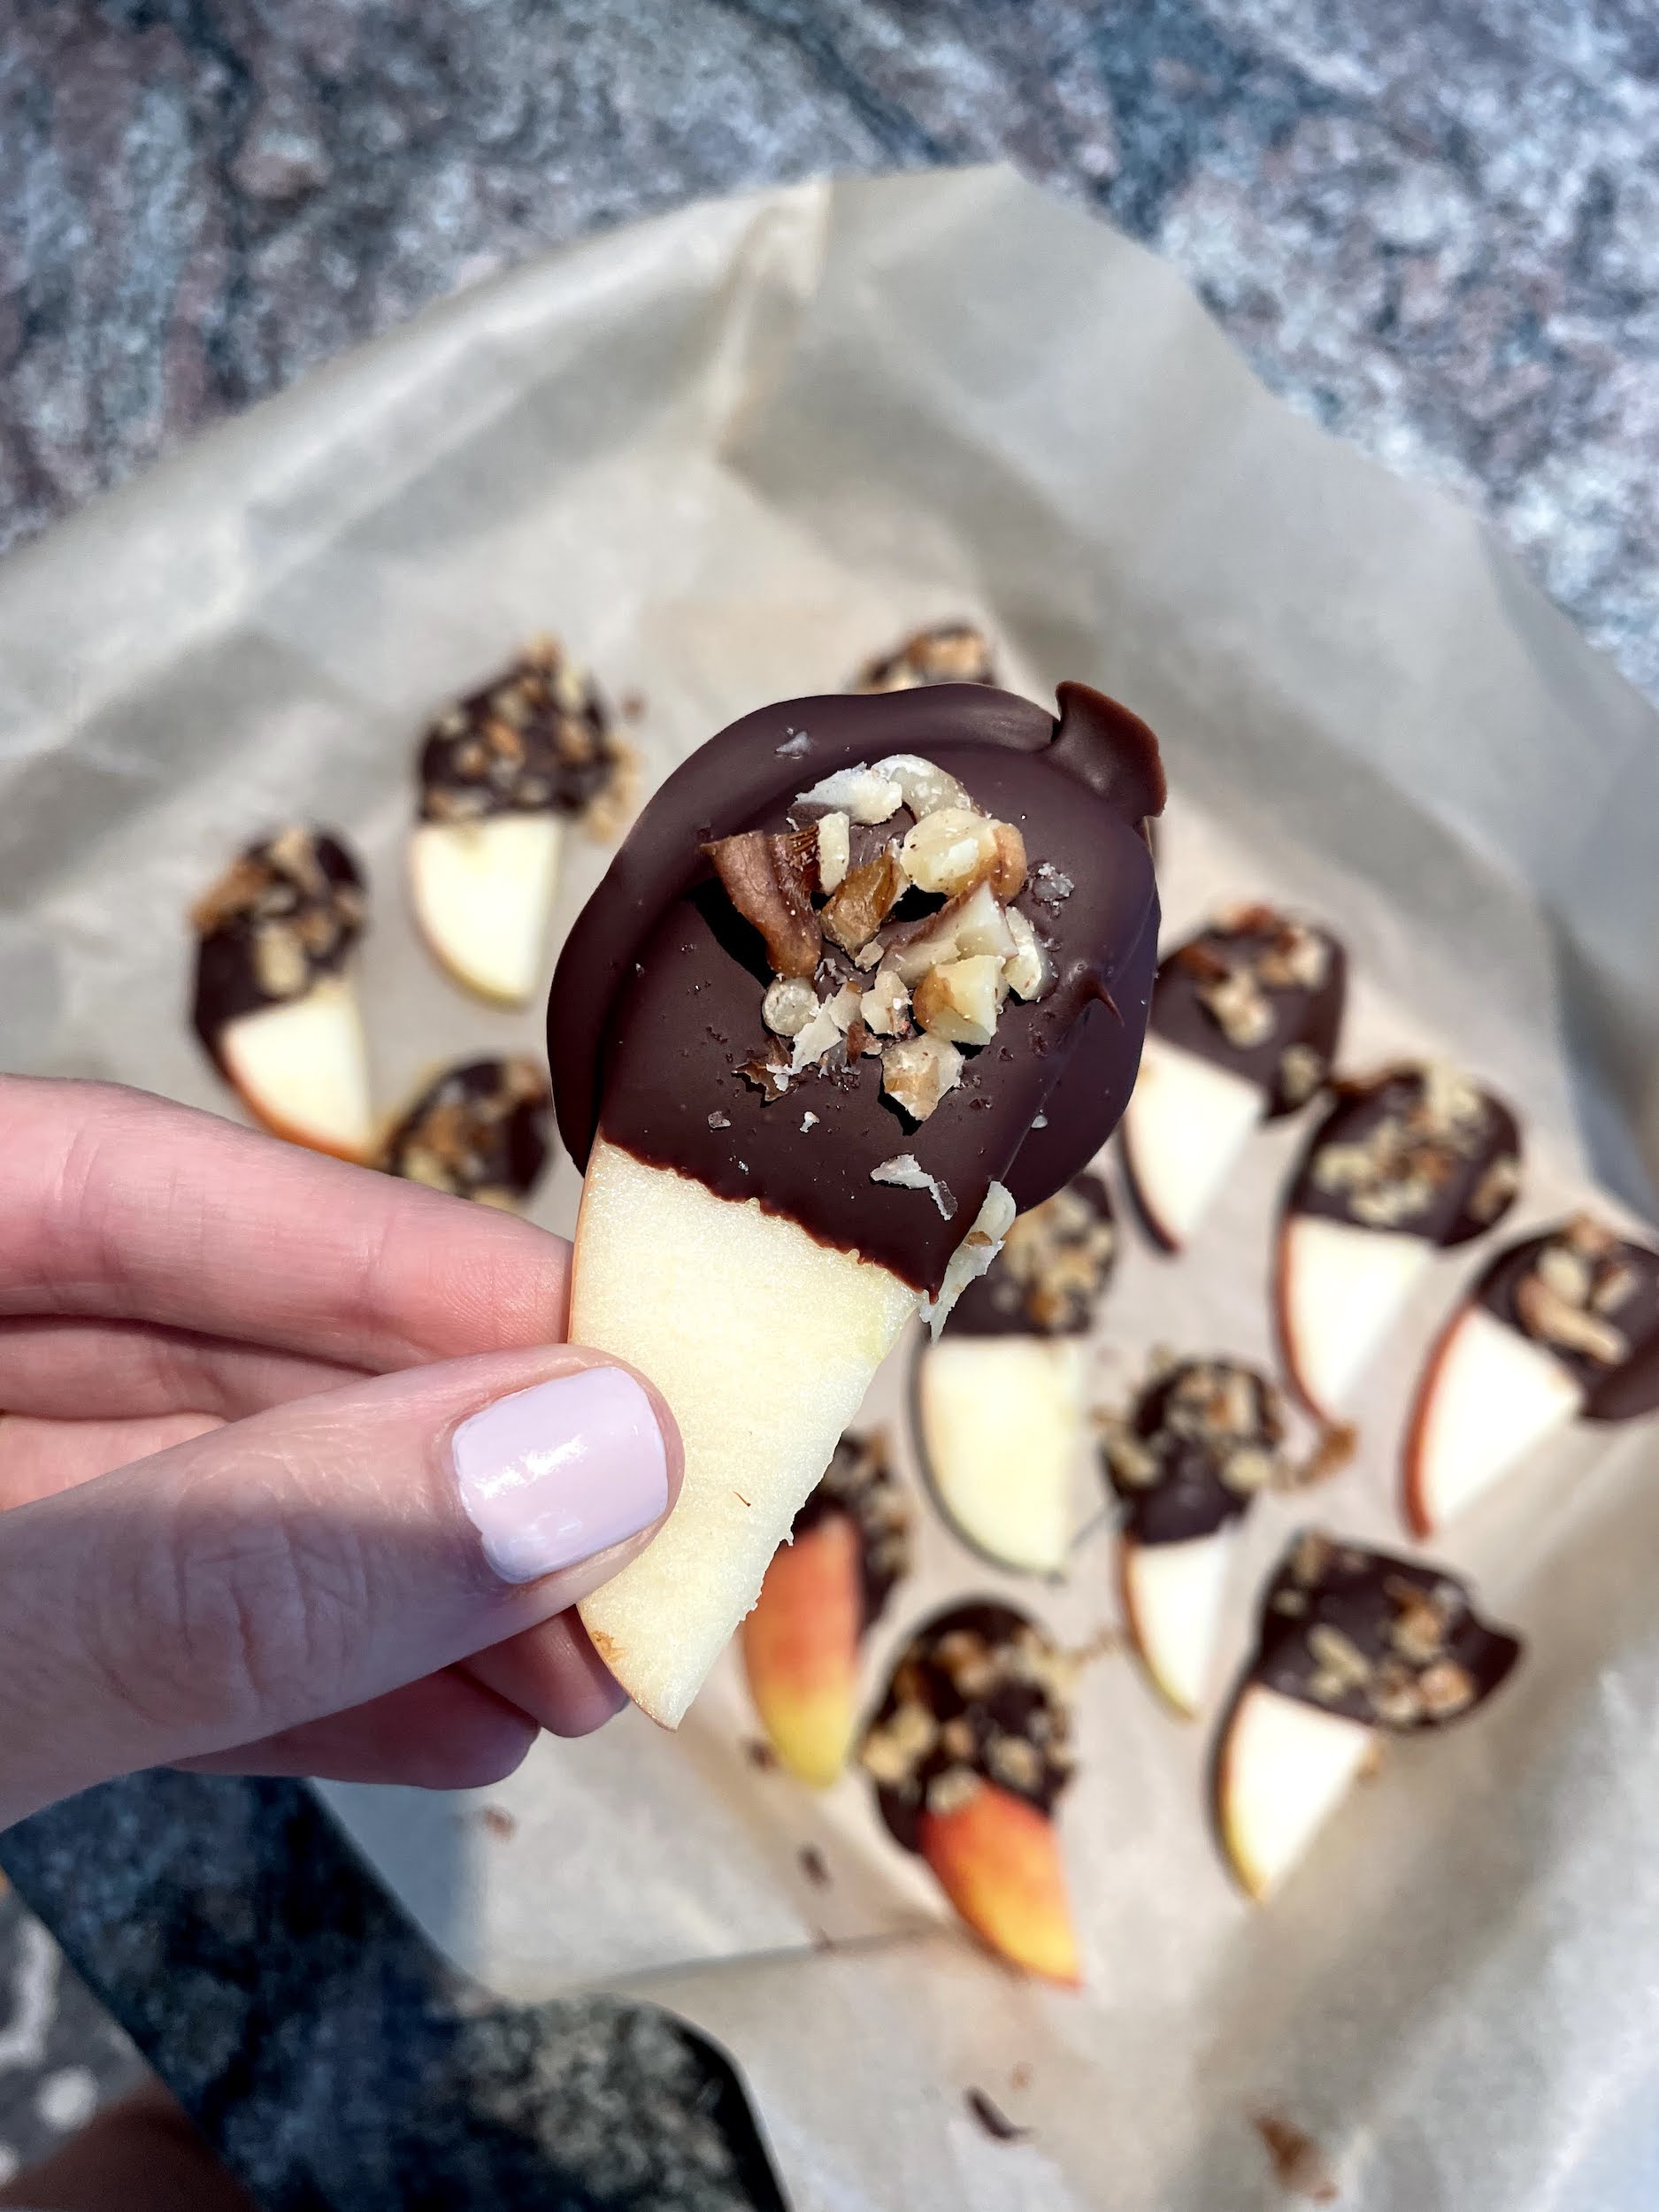
Chocolate Dipped Apples (V, DF, GF)

If you love sweets as much as I do, then I’m sure you’re always looking for healthier options like me. These chocolate dipped apples are super easy to make and you only need 1-2 to satisfy your sweet tooth. Plus they are very pretty, which makes them a great option for when you have guests or to bring to a social event. Here ya go!

Chocolate Dipped Apples (V, DF, GF)
 
Prep time
Cook time
Total time
 
Serves: 17-18 apple slices (Serving 2 apples)
Ingredients
Instructions
  1. Place parchment paper on a baking tray, slice apple into ¼ inch slices and chop up walnuts.
  2. Put the dark chocolate + coconut oil into a glass bowl or measuring cup in the microwave and melt at 30 second increments and stir. Usually will take about 2 minutes to melt everything without burning!
  3. Dip half of each apple into the melted chocolate and place on parchment paper. Sprinkle with chopped walnuts + sea salt every few apples as the chocolate will harden quickly.
  4. Place in the fridge for at least 30 minutes to harden and enjoy! Lasts in the fridge for up to 3 days.


Happy snacking!

With Health + Happiness Always,
Jax

PS – Looking for a group program to learn more about nutrition + create a healthy, sustainable lifestyle? Check out my 6 Week Nutrition 101 Group Program launching on Monday, March 7th!


Peppermint Holiday Bark

This holiday treat is a classic: PEPPERMINT HOLIDAY BARK. I traditionally bring this as a dessert or gift it to friends + family since it’s super thoughtful, yummy + easy to make. If you don’t know this about me by now, I’m a HUGE fan of dark chocolate. You can also use whatever toppings you love or readily have available in your pantry. This recipe is the perfect fit for the “Little Adapts” lifestyle – easy + convenient!

Peppermint Holiday Bark
 
Prep time
Cook time
Total time
 
Serves: 32 pieces
Ingredients
Instructions
  1. In a glass measuring cup or bowl, place dark chocolate, coconut oil + peppermint and heat for about 2 minutes. Checking every 40 seconds to mix the chocolate and make sure it doesn’t burn.
  2. While the chocolate is heating, place parchment paper over a large cookie tray and chop cashews.
  3. Pour chocolate mixture in the middle of the parchment paper in a rectangular shape.
  4. Use a spatula to spread out the mixture evenly, but make sure not to make it too thin or it will fall apart!
  5. Distribute nuts, seeds, berries + coconut (you can obviously substitute for whatever toppings you prefer in your bark!)
  6. Place into the fridge for about 15-20 minutes to harden.
  7. Take the chocolate out of the fridge and cut into bark like pieces.


Hope you enjoy them as much as I do – Happy Holidays!

With Health + Happiness Always,
Jax

PS – Want to start 2022 with your best foot forward? Join me for the 12 Day Real Food Reboot launching on Monday, January 3rd!