No Bake Fudge Brownie Bites (Nut-free!) (V, DF, GF, NF)

One of my all time fave desserts is a BROWNIE! However, many of my friends + clients have nut allergies so I wanted to make this recipe nut-free, especially for them. The combo of tahini and oat flour is truly delectable and as always these bites are the perfect energy boost, snack and dessert to satisfy your every need. The best part? All you need is a bowl, a spatula, a measuring cup + tablespoon so it’s an easy clean up. Happy snacking!


No Bake Fudge Brownie Bites (Nut-free!) (V, DF, GF, NF)
 
Prep time
Total time
 
Author:
Serves: 15 balls
Ingredients
Instructions
  1. Add all ingredients except chia seeds + chocolate chips into a large bowl and mix with a spatula.
  2. Once well combined, fold in chia seeds + chocolate chips. Then roll into small balls about the size of a golf ball.
  3. Store in an airtight container in the fridge for 2 weeks or the freezer for up to a month. Enjoy!


Don’t forget to tag me if you make it 🙂

With Health + Happiness Always,

Jax

PS – Looking for a reset before summer? Check out my FREE 3 Day Real Food Detox to feel your best!

Apple Pie Cookies (V, DF, GF)


Happy Fall Y’all! If you’ve tried my banana breakfast cookies, then you’ll LOVE these apple pie cookies. They are just as delicious and nutritious, but are packed with all the fall feels you are looking for. As always, they are the perfect breakfast cookie, snack or dessert and it’s another recipe that your kids will love to make with you and eat!

Apple Pie Cookies
 
Author:
Ingredients
Instructions
  1. Preheat the oven to 350 degrees F. Place the water + ground flax seed into a small bowl + whisk. Then let it sit for 5 minutes.
  2. In a large bowl, mix wet ingredients together: apple sauce, almond butter, flax egg + maple syrup.
  3. Then add in oats, cinnamon, and baking powder until well combined.
  4. Fold in apples and pecans.
  5. Using a spoon or ice cream scooper, place batter onto baking tray.
  6. Bake for about 15 to 17 minutes until edges are browned. Make sure to rotate trays halfway!
  7. Cool on baking rack for 10 minutes + enjoy! Keep in the fridge for up to 2 weeks.


Don’t forget to tag me if you make them 🙂

With Health + Happiness Always,

Jax

Vegan Milky Ways (GF, DF, V)

I created this recipe back in October 2021 because I had been wanting to “little adapt” my favorite candy bar – the Milky Way – for a long time. However, I only shared it on IG when it really needed to live on my website so more beautiful humans like you can find it 🙂 Let me tell you – THIS RECIPE IS FIRE and it’s here just in time for Halloween! Happy treatin’ yo’self this month!

Vegan Milky Ways (GF, DF, V)
 
Prep time
Cook time
Total time
 
Author:
Serves: 1
Ingredients
Chocolate Layer
Nougat
Caramel
Instructions
  1. Line 8 x 6 pan w/ parchment paper, place chocolate chips and coconut oil in a glass measuring cup. Heat the chocolate in 30 sec increments in a microwave and stir until fully melted.
  2. Pour half of the chocolate on the bottom of the pan, evenly, and place the pan in the freezer. Set rest aside.
  3. Prepare nougat by adding marshmallows and water to a microwave bowl. Heat for 30 sec, add the cacao powder and stir softened marshmallows. Continue to heat in 30 sec increments until you have a creamy light brown marshmallow consistency.
  4. Take the pan out of the fridge and spread nougat on top of the chocolate layer with a spatula. Leave room on sides for the top layer of chocolate to run over and seal edges. Place back in the freezer while you make the caramel layer.
  5. Heat a pan on low heat and add almond butter, maple syrup and vanilla extract. Continuously mix with a spatula until all ingredients are combined.
  6. Take the pan out of the freezer and add caramel layer. Again, leave room on the sides. Place the pan back in the freezer and leave for 3-5 minutes.
  7. Finally, reheat the remaining chocolate and coconut oil and take the pan out of the freezer a final time. Pour melted chocolate over the top and fill in the sides.
  8. Place the pan in the fridge for 10-15 minutes to let the chocolate harden. Take out of the fridge and cut into slices. Enjoy!

Love, Jax

PS – Looking to feel fit + fabulous this fall? Sign up for 7 days FREE of the Little Adapts By Jax App and start utilizing the weekly schedule for a svelte, sculpted you in no time!

Frozen 4th of July Coconut Yogurt Bark (GF, DF, V)

Happy July! Now that it’s HOT, it’s time for a cooling treat to celebrate this country’s independence day. I eat coconut yogurt bowls on the regular, but this recipe takes it up a notch and makes me feel like I’m eating delicious frozen yogurt so it’s perfect for a mid afternoon pick-me-up or dessert. The best part? It can be whipped up in just a few minutes and is the perfect easy and vegan BBQ treat that your friends and family will LOVE. Don’t forget to tag me @littleadaptsbyjax if you whip this up 🙂

Frozen 4th of July Coconut Yogurt Bark
 
Prep time
Total time
 
Author:
Serves: 15-20 pieces
Ingredients
Instructions
  1. Place parchment paper onto a small baking sheet.
  2. Add coconut yogurt and maple syrup to a bowl and whisk until well combined.
  3. Pour mixture onto the parchment paper in the pan and make sure it is spread out evenly and not too thick.
  4. Evenly distribute add-ins by sprinkling over the coconut mixture.
  5. Store in the freezer for 1-2 hours to let it solidify. Once solid, take out of the freezer and place the parchment paper on a large cutting board. Cut up into pieces and enjoy! (You may want to let it thaw for a few minutes before serving.)
  6. Store in the freezer in an airtight container to prevent freezer burn for up to 3 months.


Love, Jax

PS – Looking to detox before the summer? Sign up for my FREE 3 Day Real Food Detox Guide here so you can start feeling your best NOW!

Sea Salt Cookie Dough Balls (DF, GF, V)

Happy April and you can feel spring is in the air! I’ve been living off these energy balls and the best part is that they taste EXACTLY like cookie dough. Plus, they are packed with healthy fats, fiber, protein and a little bit of sweetness to curb your sweet tooth. They are the perfect for pre or post workout, snack, or healthy treat. You can even bring them to the holidays for a healthy dessert and I promise your guests will LOVE them!

Sea Salt Cookie Dough Balls (DF, GF, V)
 
Prep time
Total time
 
Author:
Serves: 20 balls
Ingredients
Instructions
  1. Add all ingredients into a large bowl and mix with a spatula.
  2. Once well combined, roll into small balls about the size of a golf ball.
  3. Store in an airtight container in the fridge for 2 weeks or the freezer for up to a month (if they even last you that long). Enjoy!


Love, Jax

PS – Looking to detox before the summer? Sign up for my FREE 3 Day Real Food Detox Guide here so you can start feeling your best NOW!

Strawberry Nice Cream (DF, GF, V)

Whenever I think of February, I think of Valentine’s Day – which makes me think of pink and red healthy desserts. I can’t believe that I haven’t shared this recipe already because it is one of my all time faves for nice cream. This delicious (and veggie packed) recipe was actually created during my first pregnancy because I was craving cold, healthy desserts every night in my third trimester, which was the heat of the summer. But there is nothing wrong with a little ice cream in the dead of winter to treat yo’self this month. It’s the perfect single serving size or it can easily be doubled up for you and your loved one as a healthy Vday treat. Sending you lots of love today and always!

Strawberry Nice Cream (DF, GF, V)
 
Prep time
Total time
 
Author:
Serves: 1
Ingredients
Instructions
  1. Place frozen cauliflower rice, frozen strawberries + coconut milk into a high speed blender.
  2. Start to blend on a low speed and gradually increase the speed enough to blend but not turn your mixture into a smoothie. (The key to nice cream is using minimal liquid so just add a splash more if you feel like you need it.)
  3. Eat immediately in a bowl and top with coconut and chocolate chips. Enjoy!


With Health + Happiness Always,

Love, Jax

PS – Looking to mix up your workout routine and try workouts that sync with your cycle? Register here for FREE and get 6 of my favorite workouts!

Peppermint Hot Chocolate (DF, GF, V)

As a kid, I’ve always loved hot chocolate (and have been craving it like crazy this pregnancy!) However, with a dairy allergy and decreasing my sugar intake these days, there aren’t many hot chocolate brands on the market that meet the “little adapts” standards. When this happens, I go into my kitchen and recreate it. This hot chocolate only takes about 10-15 minutes to make, and I promise it will bring back all of your winter, childhood memories with its peppermint twist!

Peppermint Hot Chocolate (DF, GF, V)
 
Cook time
Total time
 
Author:
Serves: 1
Ingredients
Instructions
  1. Pour dairy free milk into a small pot and warm on medium-low heat.
  2. After a few minutes, add in unsweetened cacao powder + coconut sugar. Use a whisk to combine the ingredients as it continues to heat up until it is one consistent color and there are no clumps in the beverage. Feel free to taste test and add more cacao powder or coconut sugar if you want a more sweet, chocolate flavor.
  3. Finally, add in the peppermint and continue to whisk for another minute. Feel free to taste one last time to make sure it’s up to your liking.
  4. Add your toppings and enjoy!

Happy snacking and happy holidays! Don’t forget to tag me if you make it! 🙂

With Health + Happiness Always,
Jax

“Little Adapts” Twix Bars (DF, GF, V)

IT’S HERE — “Little Adapts” Twix Bars! Last year it was Milky Ways and now it’s Twix Bars and you do not want to miss out on these bad boys. Not only are they the perfect combo of cookie crunch, gooey caramel + velvety dark chocolate but they are filled with real, nutrient dense ingredients. This way you can enjoy some Halloween candy without all the guilt of derailing your health goals. Plus, your kids will LOVE them because Dakota baby does (but what food doesn’t she love?!) Here are the dEats:

"Little Adapts" Twix Bars
 
Author:
Serves: 16 bars
Ingredients
Cookie Layer
Caramel Layer
Chocolate Layer
Instructions
  1. Preheat the oven to 350 degrees F and line a 5x7 glass pan with parchment paper.
  2. Add all ingredients for the cookie into a bowl and combine until a dough forms. Press down the dough into the bottom of the pan until it’s evenly distributed. Bake for 10 to 12 minutes until the edges are brown. Let the cookie layer cool for 10 - 15 minutes.
  3. While the cookie layer is cooling, add all ingredients for the caramel layer into a food processor and mix until a thick sauce is created. Make sure to scrape down the sides.
  4. Once the cookie layer is cooled, spread the caramel layer evenly over it. Cover the pan and place in the freezer for 1-2 hours or overnight to harden — making it easier to slice.
  5. Take the pan out of the freezer to thaw slightly and add the chocolate chips and coconut oil to microwave safe bowl. Heat on increments of 30-45 seconds (depending upon your microwave strength) until the chocolate is fully melted. Stir in between each increment so the chocolate doesn’t burn.
  6. Slice the big cookie layer into 1 inch slices and halve each slice so you have 16 “Twix” size bars.
  7. Place parchment paper on a baking tray and line up the cookies on it. With a spoon, drizzle the chocolate over the top of each bar and smooth out chocolate on the sides so all 3 sides are covered. Sprinkle with sea salt and place in the fridge for 15-20 minutes to harden.
  8. Enjoy immediately and store in an air tight container for up to 2 weeks. Will last in the freezer for up to a month!


Happy trick o’ treating yo’self! Hope you enjoy this recipe as much as we do!

With Health + Happiness Always,
Jax

No Bake PSL Bites (GF, DF)

It’s pumpkin season, baby! I wanted to spice up my snack and dessert options so I gave these a whirl and OMG. They are everything I could have dreamed of and more – PSL vibes all the way. All you need is a bowl, a spatula and some pumpkin pie spice (because there is nothing worse than opening a full can of pumpkin purée for just a tbsp!) Happy October!

No Bake PSL Bites
 
Prep time
Cook time
Total time
 
Serves: 24 balls
Instructions
  1. Add all ingredients into a large bowl and mix with a spatula.
  2. Once well combined, roll into small balls about the size of a golf ball.
  3. Store in an airtight container in the fridge for 2 weeks or the freezer for up to a month (if they even last you that long). Enjoy!


Hope you enjoy this recipe as much as we do!

With Health + Happiness Always,
Jax

PS – Have you been waiting for a sign to join the Little Adapts By Jax app? My ONLY sale of the year is happening right now and you can use code TENSALE for 7 days FREE and $10 per month for the NEXT YEAR!

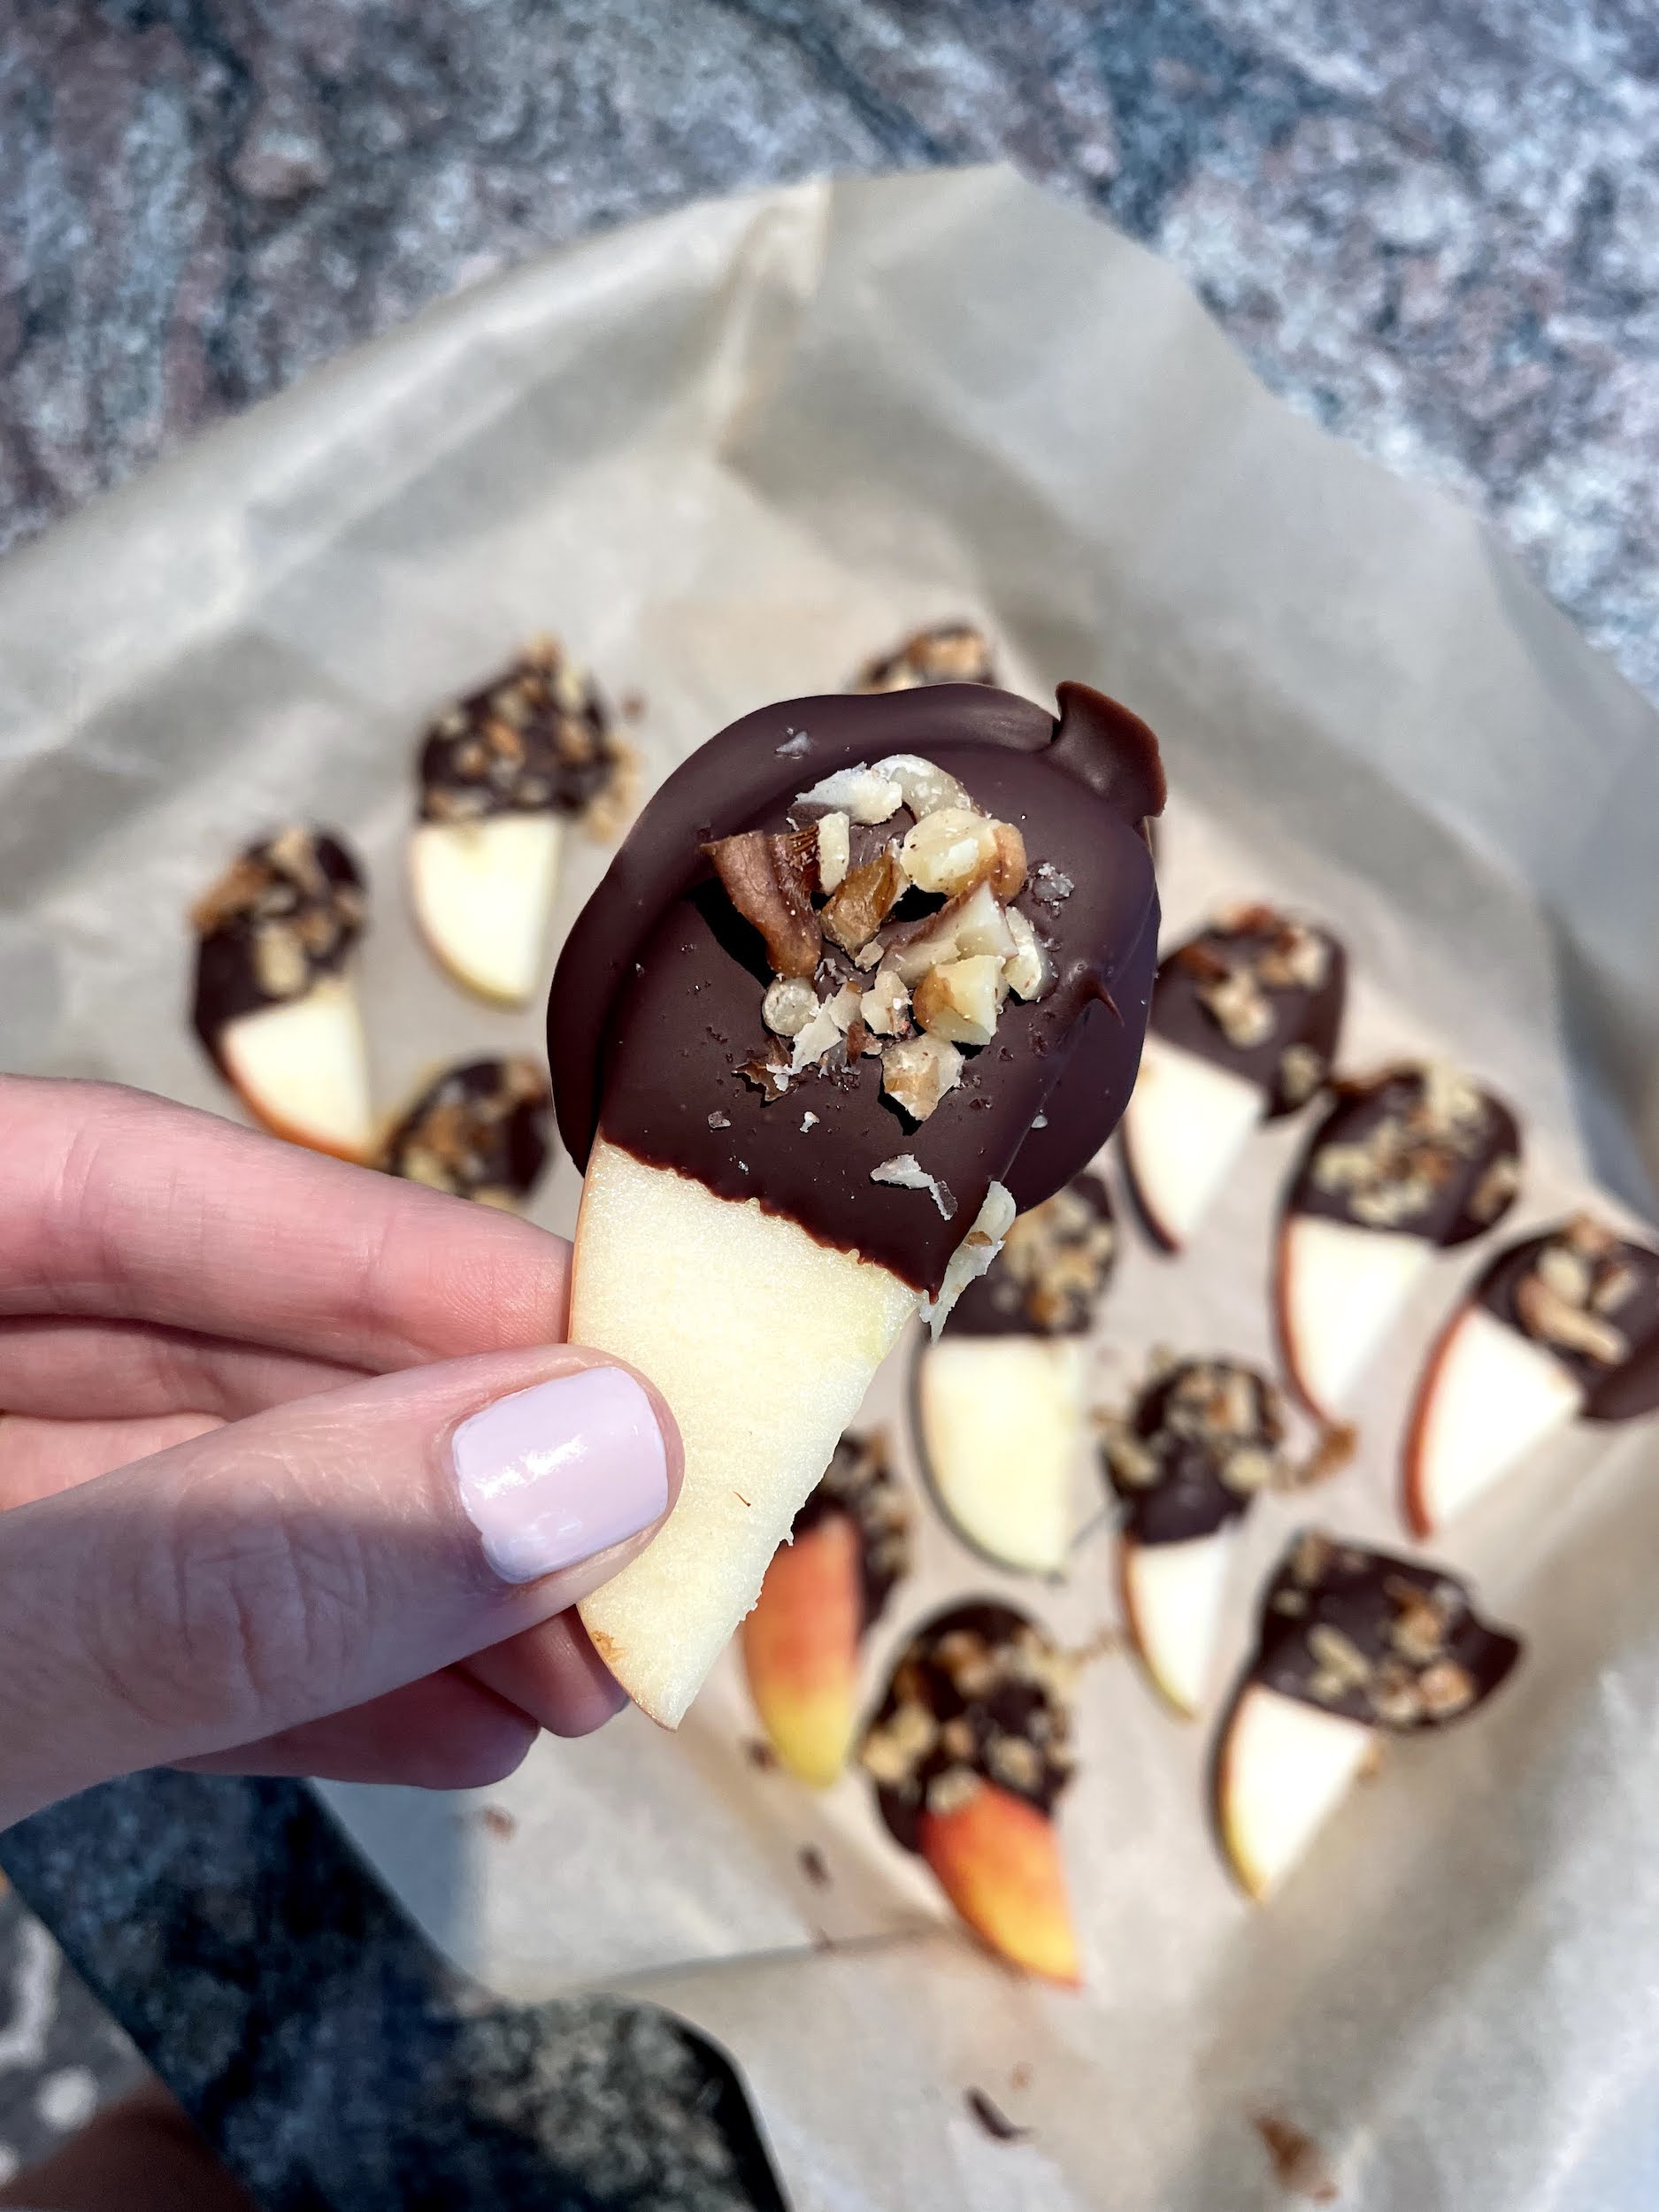
Chocolate Dipped Apples (V, DF, GF)

If you love sweets as much as I do, then I’m sure you’re always looking for healthier options like me. These chocolate dipped apples are super easy to make and you only need 1-2 to satisfy your sweet tooth. Plus they are very pretty, which makes them a great option for when you have guests or to bring to a social event. Here ya go!

Chocolate Dipped Apples (V, DF, GF)
 
Prep time
Cook time
Total time
 
Serves: 17-18 apple slices (Serving 2 apples)
Ingredients
Instructions
  1. Place parchment paper on a baking tray, slice apple into ¼ inch slices and chop up walnuts.
  2. Put the dark chocolate + coconut oil into a glass bowl or measuring cup in the microwave and melt at 30 second increments and stir. Usually will take about 2 minutes to melt everything without burning!
  3. Dip half of each apple into the melted chocolate and place on parchment paper. Sprinkle with chopped walnuts + sea salt every few apples as the chocolate will harden quickly.
  4. Place in the fridge for at least 30 minutes to harden and enjoy! Lasts in the fridge for up to 3 days.


Happy snacking!

With Health + Happiness Always,
Jax

PS – Looking for a group program to learn more about nutrition + create a healthy, sustainable lifestyle? Check out my 6 Week Nutrition 101 Group Program launching on Monday, March 7th!