Easy French Toast

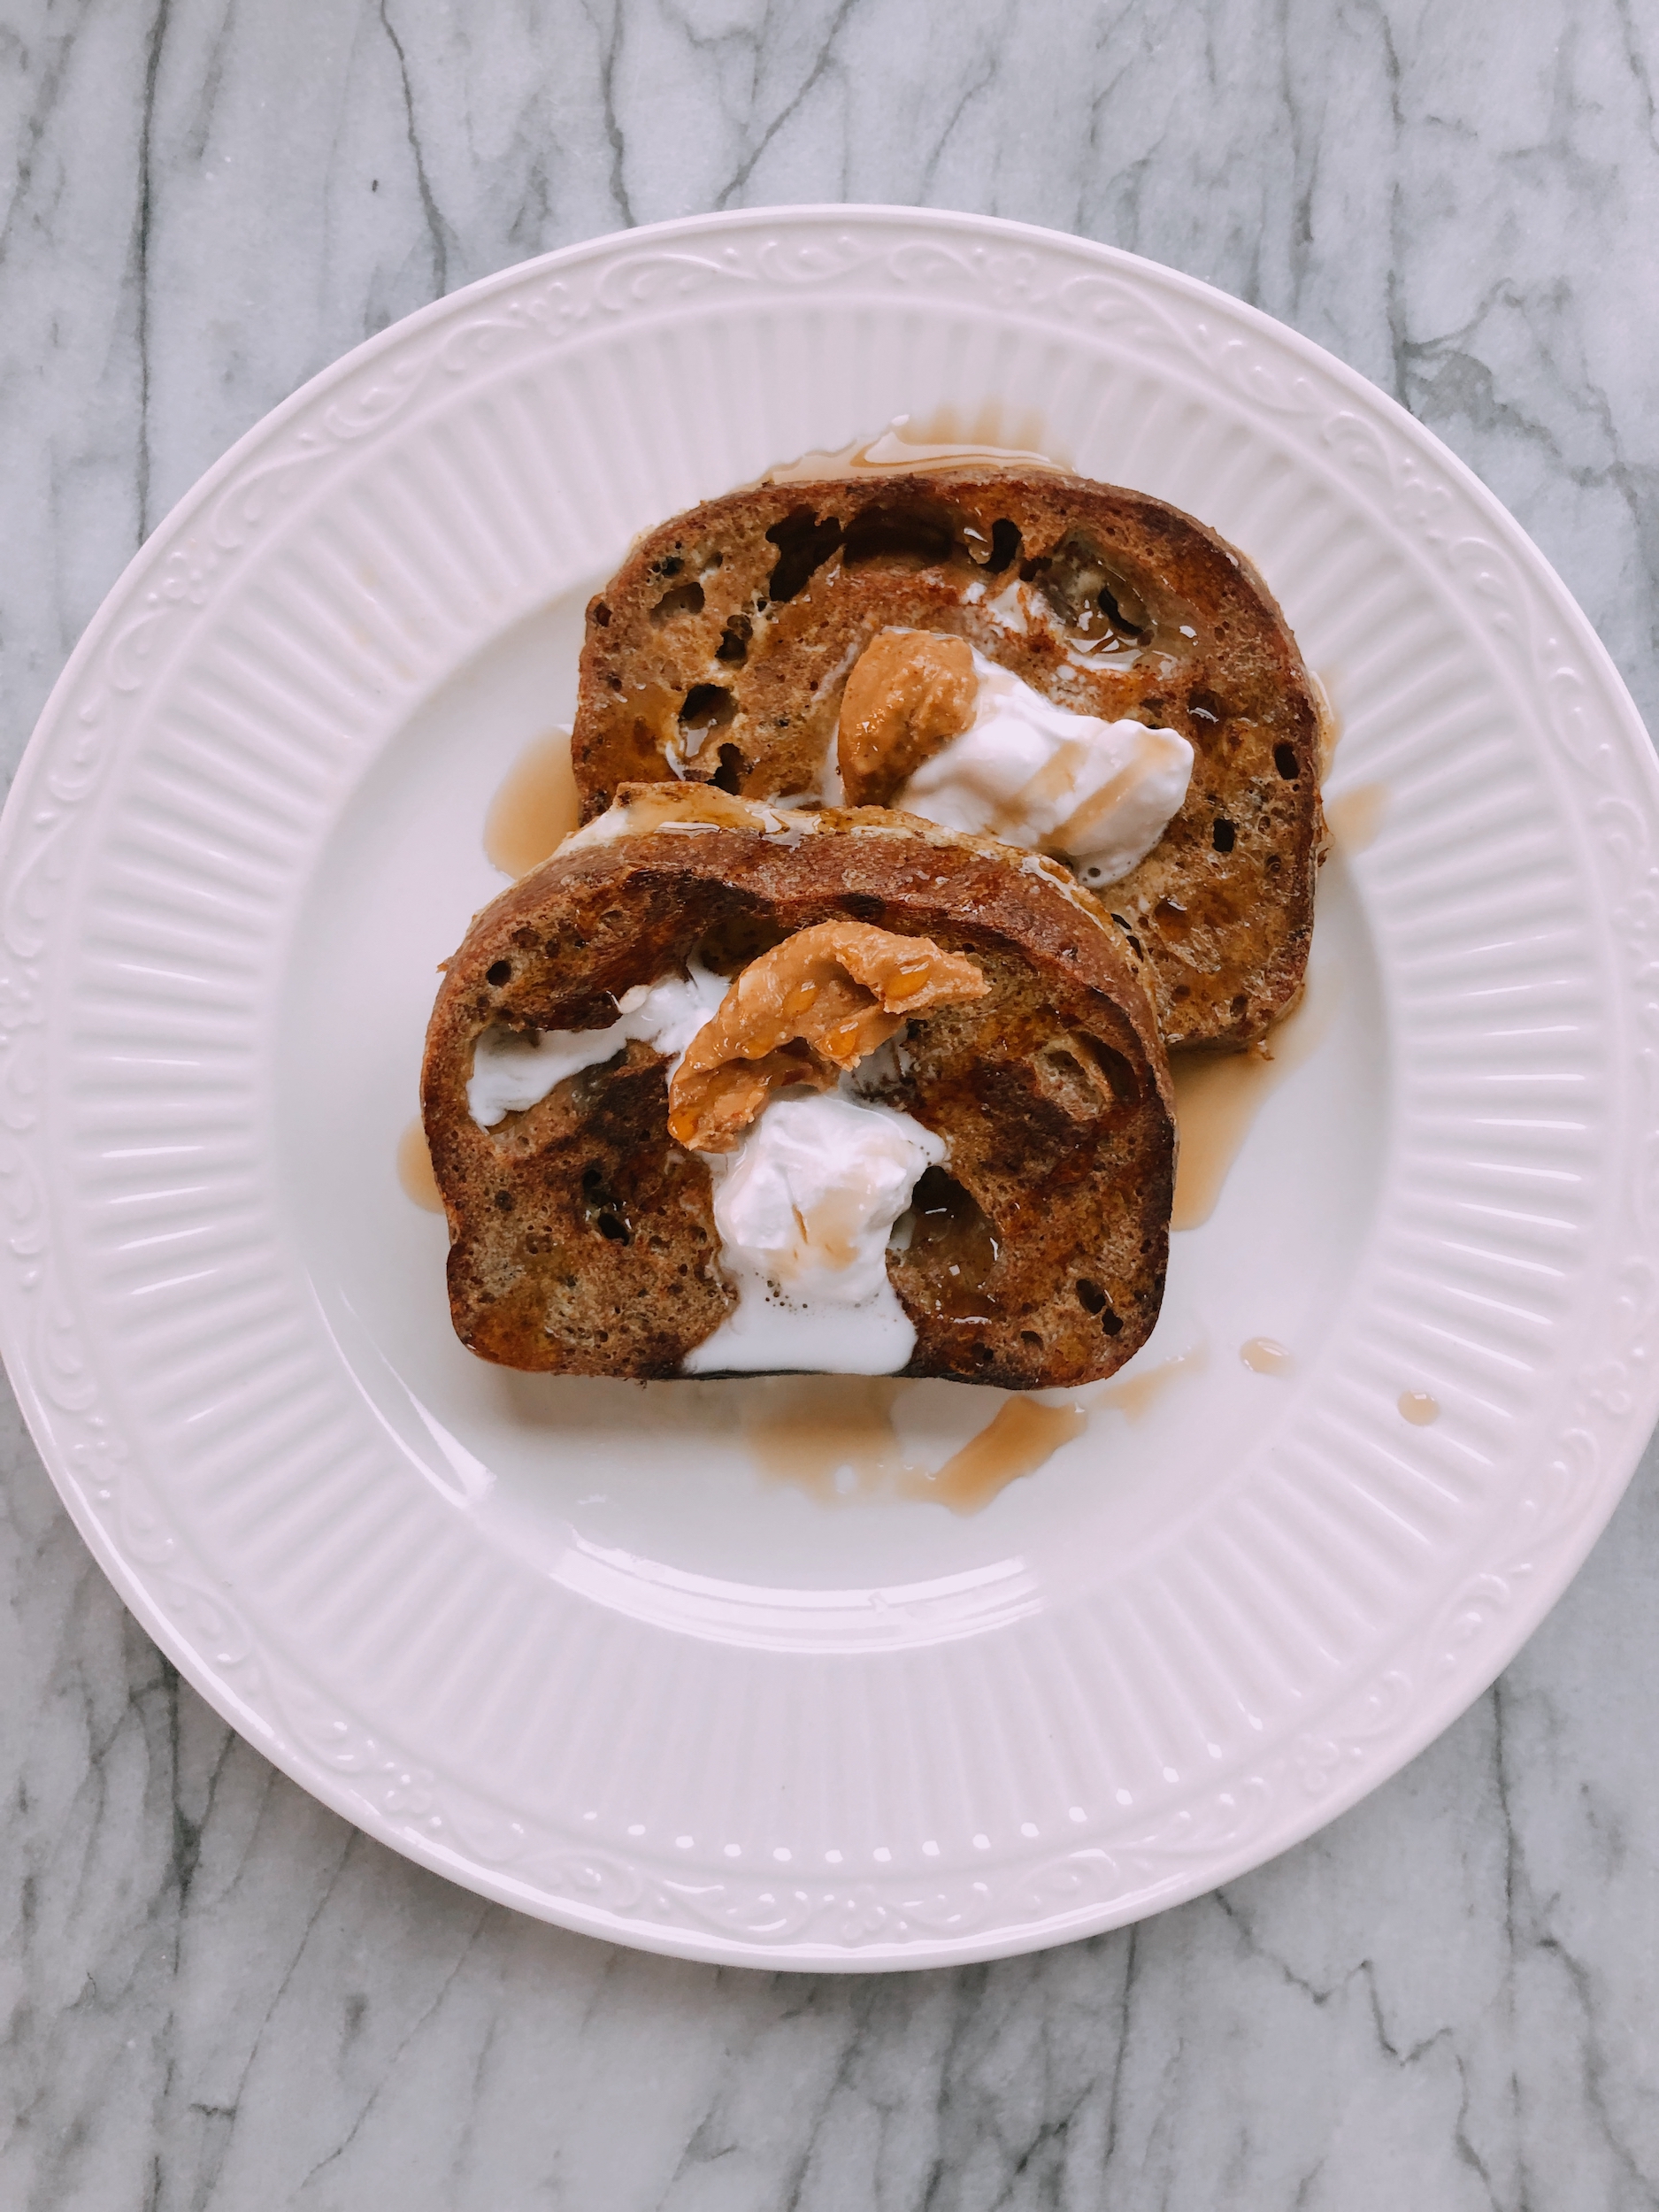
My mom used to make french toast a lot when I was growing up, but I’ll be honest I haven’t made it in a very long time. My go to carby breakfast is typically pancakes, but since I had just gotten this new gluten-free cinnamon raisin sourdough – I felt like french toast was in order. So I called my mom and asked her what her recipe was. I forgot just how simple it was to make. I had our delicious breakfast ready in no time and we both loved it!

The key is to top it off with nut butter, coconut milk/cream and maple syrup (you always want to balance out your carbs with healthy fat + protein so it doesn’t spike your blood sugar levels.) I would have added berries but we were completely out. However, the next day I remembered that I could just heat up my frozen blueberries and that was delicious as well. Hope you love this recipe as much as I do!

Easy French Toast
 
Prep time
Cook time
Total time
 
Serves: 4 servings
Ingredients
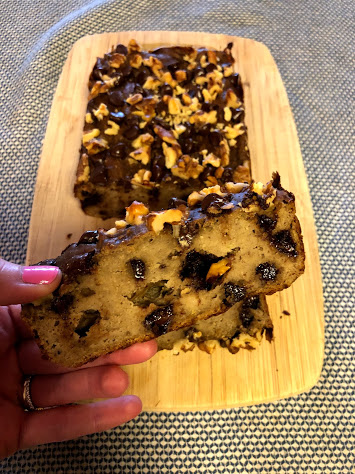
  • 8 slices of gluten-free sourdough
  • 2 eggs
  • ⅛ cup of non-dairy milk
  • ½ tsp cinnamon
  • 1 tsp vanilla extract
  • 2 tbsp coconut oil
  • Toppings: nut butter, coconut milk/cream, maple syrup and/or berries
Instructions
  1. Heat a pan on medium heat.
  2. Whisk together the eggs, non-dairy milk, cinnamon + vanilla extract in a bowl.
  3. Once the pan is heated, add a little bit of coconut oil. Then dip the bread on both sides into the wet mixture. Note: You'll want to make sure excess mixture drips off the bread before putting it on the pan or it may get "eggy" on the bread.
  4. Cook the bread on each side for about 2-3 minutes until brown + toasted. Do this a few more times until all of the bread is cooked.
  5. Serve with nut butter, coconut milk/cream, maple syrup and/or berries and enjoy!
Notes
Stays in the fridge for up to 1 week. You can also freeze leftovers for up to a month!


With Health + Happiness Always,
Jax

PS – Want more healthy comfort food? Check out the “Clean Comfort Cookbook” on my app!

Vegan Blueberry Banana Bread (Nut free!)

Happy Monday! One of my favorite ways to be creative in my business is recipe development, especially when it comes to treats. I never feel deprived or restricted because I love finding ways to make my favorite treats with healthier ingredients and less sugar. It’s a reminder that we can still satisfy our cravings with foods that taste amazing and also are good for our bodies! It’s such a fun challenge for me.

A new recent challenge is making my recipes nut-free as I have many friends and clients who have nut allergies. This has forced me to diversify the ingredients that I’m putting in my recipes, which has added a whole new texture and taste in a really great way. I love that this community is always helping me to continue to learn and grow so I can better support all of you on your healthy + happy journeys 🙂 PS – This banana bread has been taste tested by all of my siblings and they loved it!

Vegan Blueberry Banana Bread (Nut free!)
 
Prep time
Cook time
Total time
 
Serves: 6-8
Ingredients
  • 1¼ cup oat flour (1⅔ cup oats blended into flour)
  • ½ tsp sea salt
  • 1½ tsp baking powder
  • 1 tsp cinnamon
  • 3 mashed bananas
  • ¼ cup maple syrup
  • ¼ cup melted coconut oil
  • 1 tbsp vanilla extract
  • 4 flax eggs (4 tbsp ground flax seed + 6 tbsp water)
  • ⅓ cup frozen or fresh blueberries + handful for on top
  • Sprinkle of sunflower seeds or coconut on top
Instructions
  1. Preheat the oven to 325 degrees F.
  2. Mash bananas in a bowl and mix flax eggs in a small bowl.
  3. Add maple syrup, coconut oil + vanilla extract to mashed bananas + mix. Then add in flax eggs and mix again.
  4. Add in the dry ingredients and mix until well combined.
  5. Fold in the blueberries and line a bread pan with parchment paper.
  6. Pour batter into the pan and sprinkle with more blueberries and sunflower seeds or coconut.
  7. Bake for about 50 to 55 minutes. It should be ready when a toothpick comes out clean. Let it cool for 10 minutes, slice + enjoy!
  8. *Store in tin foil, unsliced in the refrigerator for up to 2 weeks.


With Health + Happiness Always,
Jax

PS – Want to learn how to add “little adapts” to your lifestyle? Click here to sign up for a FREE 7 day trial to my online membership!

Savory Vegan Breakfast Bowl

Each time I do the Reboot, I’m inspired to make new recipes! Since this is a fully plant based/vegan diet, I tend to have mostly sweet versus savory breakfasts since eggs are not allowed. It got me thinking that I could just recreate one of my favorite egg dishes without the egg and that’s exactly what I did 🙂 This breakfast is packed with veggies, so much flavor and makes you forget all about the eggs. Highly recommend trying it for breakfast or any other meal for that matter!

Savory Vegan Breakfast Bowl
 
Prep time
Cook time
Total time
 
Serves: 1
Ingredients
  • 2 tbsp avocado oil
  • 1 slice of a red onion, diced
  • 6 Brussel sprouts, thinly sliced
  • 3 mini sweet peppers sliced
  • ½ cup broccoli slaw or broccoli florets
  • ¼ cup veggie broth
  • 1 cup raw spinach
  • 6 cherry tomatoes
  • 2 tbsp hummus
  • 1 tbsp vegan pesto
  • ½ avocado
Instructions
  1. Heat a small pan on medium-low heat and then add the avocado oil.
  2. Once the oil is heated, sauté the onion for 2-3 minutes and then add in the Brussel sprouts, peppers + broccoli slaw/florets.
  3. Cook for about 5 minutes and then add in veggie broth, spinach + tomatoes.
  4. Stir, turn the heat to low + cover for another 3-5 minutes.
  5. Serve in a bowl and top with hummus, vegan pesto and ½ avocado. Enjoy!


Have an amazing day and please tag me if you make the recipe 🙂

With Health + Happiness Always,
Jax

Nut + Granola Bowl

I try to keep breakfast as easy + quick as possible these days! Typically, when I want a “cereal” bowl – I either make a muesli or granola bowl. However, I recently made breakfast out of leftover trail mix and fruit we had when we were on our National Park tour and it’s become a weekly staple. In an effort to keep myself more satisfied + full, reduce sugar + carb intake, and reduce snacking in between breakfast and lunch, this nut + granola is the perfect breakfast. It takes less than 5 minutes to make, including the time you might need to slice up some fruit, and you’re eating in no time! *Note: You can use any nuts, seeds, and granola you have on hand.

Nut + Granola Bowl
 
Prep time
Total time
 
Serves: 1
Ingredients
Bowl
Topping
Instructions
  1. Place all nuts + seeds into a bowl and mix up.
  2. Add in fresh berries + non-dairy milk and enjoy!


Happy breakfast bowls!

With Health + Happiness Always,
Jax

Cookie Granola

When we ran out of granola last week and I wanted to get through as much of the food before leaving Colorado, I decided to make “cookie” granola. This granola is a twist on my classic homemade granola based on what I had available to me, which can be found in my Clean Comfort Cookbook and is available on my LA Lightning Sculpt + Nutrition Membership. It honestly tastes like you’re eating “cookies + milk” with some fresh berries on top and it hit the spot last week when we were at our campsite in Zion. Best part? It requires absolutely no oil!


Cookie Granola
 
Prep time
Cook time
Total time
 
Author:
Serves: 6 (1/2 cup per serving)
Ingredients
Instructions
  1. Preheat oven to 350 degrees F.
  2. Mix wet ingredients together and then add in dry ingredients.
  3. Fold in chocolate chips and cacao nibs. Place on a baking tray with parchment paper and press down with the spatula so you the "batter" sticks together, but is also thin enough to bake the entire mixture.
  4. Bake for 15 minutes and then carefully with a large spatula flip in sections to keep the clusters of granola together.
  5. Place the tray back in the oven and make sure to rotate the tray in order to have the granola bake evenly.
  6. Bake for another 5 minutes or until the granola is browned.
  7. Take out of the oven for 10 minutes to cool. Then break up into clusters and enjoy! Store in an airtight container in the fridge for up to a month.


Don’t forget to tag me if you make it @littleadaptsbyjax 🙂

With Health + Happiness Always,
Jax

PS – Want to learn how to create a healthy + happy sustainable lifestyle with the “little adapts” philosophy? Click here to sign up for my 6 Week Nutrition 101 Group Program launching on Monday, August 10th!

Green Smoothie Bowl

Happy Monday! I love a good acai bowl, but unfortunately I didn’t have a chance to buy any frozen acai packets since I’ve been out here! I decided to make a green smoothie bowl instead and it came out incredible that I think “smoothie bowls” will have to become a new thing for me. I also managed to pack lots of veggies in there. “Little adapt”: I used a combo of frozen mangos + zucchini and there was no need to use a banana for extra creaminess! Hope you enjoy this bowl as much as I did – happy eating!

Green Smoothie Bowl
 
Prep time
Total time
 
Serves: 1
Ingredients
Instructions
  1. Place all ingredients in blender except for toppings. If the mixture is too thick, add a splash of coconut water at a time until the smoothie is well blended but still super thick (I use the tampor a lot to make sure it mixes!)
  2. Add toppings and enjoy right away!


With Health + Happiness Always,
Jax

PS – Want to learn more about the biggest health lies that are hurting your health? Sign up for my webinar series the week of June 22nd here!

Homemade Blackberry Jam

I have to be real and tell you guys that I never liked PBJ’s growing up. I was a plain PB sandwich kind of girl. Eventually as I got older, I got into strawberry + raspberry jams but gave them up after realizing how much sugar most of them had. Now, I exclusively make my own blackberry or raspberry jam at home for my toast and breakfast bowls. The best part? It only takes about 2 minutes to throw together and is even faster if you have a muddler. This is a breakfast staple you’ll want to try because it’s easy, tastes amazing + will help you reach your health goals 🙂

Homemade Blackberry Jam
 
Prep time
Total time
 
Serves: 2-3
Ingredients
Instructions
  1. Place all ingredients in a bowl and mash + stir with a muddler.
  2. Add to your toast, oatmeal or favorite breakfast bowl and enjoy! Place in a airtight container and keeps in the fridge for a week.


Don’t forget to tag me if you make it #littleadapts 🙂

With Health + Happiness Always,
Jax

PS – Want to chat about your health goals + how to reach them faster? Click here to sign up for a complimentary health consultation today!

PBJ Cauliflower Porridge

Not going to lie, but the first time I made this recipe it was pretty good. I definitely knew that I was eating cauliflower though. However, now that I’ve perfected the recipe after making it 3 or 4 times on the Reboot – I’m OBSESSED! I actually prefer this to real oatmeal and the best part? The main 2 ingredients are: cauliflower rice + coconut milk! If you’re doing low carb or keto, this is a must for a morning staple 🙂 While I don’t eat low carb or count my calories/macros, I am:

  1. “Carb conscious” on a mostly plant based diet
  2. Always trying to get as many veggies in daily

Lastly, it’s super quick to make and cooks faster than regular oatmeal. You are very welcome!

PBJ Cauliflower Porridge
 
Prep time
Cook time
Total time
 
Serves: 2
Ingredients
Instructions
  1. Bring coconut milk to a boil in a small pot.
  2. Add cauliflower rice, cinnamon, vanilla extract, and ground flaxseed and bring the heat down to medium-low.
  3. Stir and simmer for about 5 minutes until most of liquid is absorbed into the cauliflower rice.
  4. Turn off heat and put cover on so the porridge can thicken for about 2 minutes.
  5. Pour into bowls and add on toppings. Let it cool for a minute or 2 and enjoy! You can store the second portion in a covered container in the fridge and eat reheated the next day. Keeps about 1-2 days.


Enjoy eating your veggies for breakfast – continue to stay safe + healthy!

With Health + Happiness Always,
Jax

PS – Have health goals you want to achieve before summer? Sign up for a complimentary health consultation today by clicking here!

Vegan Gluten-Free Banana Bread

As I’ve had more time to recipe test and have a lot of ingredients on hand that I’ve bought in the past to experiment with, I decided to pack more protein into your typical banana bread by using quinoa flour. If you’re plant based, quinoa is one of those staples I keep in my diet as it’s a high source of plant based protein. This banana bread is also nut free if you leave out the walnuts on top and stick with sunflower butter. Lastly, it is also #rebootapproved as long as you substitute cacao nibs for the vegan dark chocolate chips.

*Note: I have not tested this out yet with other gluten-free flours yet, but I think it would be fine to do so here just be mindful of the consistency. If you do, let me know!


Vegan Gluten-Free Banana Bread
 
Prep time
Cook time
Total time
 
Serves: 6-8
Ingredients
Instructions
  1. Preheat the oven to 350 degrees F and line a loaf pan with parchment paper.
  2. Mix flax egg and allow the mixture to thicken for a few minutes and chop up walnuts + set aside for later. Place bananas in a large bowl and mash with a fork or potato smasher.
  3. Add sunflower butter, vanilla extract + almond milk and mix until well combined. Add in flax egg and stir.
  4. Add all dry ingredients to the wet ingredients (quinoa flour, cinnamon + baking powder) and mix until a batter is formed. Fold in cacao nibs or vegan dark chocolate chips.
  5. Pour into loaf pan and optional to sprinkle walnuts and additional cacao nibs or chocolate chips on top.
  6. Bake for 35-40 minutes or until a toothpick comes out clean.
  7. Let it cool for 5-10 minutes. Pull it out of the pan using the parchment paper, slice + enjoy! Store in the fridge for up to 2 weeks.
Notes
Reboot: Use cacao nibs instead of dark chocolate chips.


Hope everyone continues to stay safe + healthy!

With Health + Happiness Always,
Jax

PS – If you need additional support (whether it’s nutrition, fitness, or both) during this time, I’m offering FREE 15 minute calls to provide:

  • 3 recipes based off what you have at home
  • 3 quick exercises based on your favorite workout classes

Click here or reply to this email to sign up!

Instagram – 10 minute IGTV workout + nutrition tips and Live IG 30 Minute Barre Sculpt Workout every Tuesday at 12 pm EST

YouTube – 10 – 45 minute at home workouts and yoga flows

Gluten-Free Everything Bagels

After weeks of playing around with ingredients to make sure this recipe had the taste of a nice doughy bagel, but also was “little adapts” approved — it’s FINALLY here! We all know that NY has the best bagels around, but I have to say my favorites have been the places on Long Island where I grew up. Trust me, I used to love a BEC or veggie cream cheese on an everything bagel. While I do love bagels, I just don’t love the way they make me feel after. If I do indulge in a bagel, I usually head to Black Seed Bagel on Elizabeth since their bagels aren’t overly big, they have tofu (dairy-free) herb cream cheese, and everything is locally sourced. Being quarantined has inspired me to recipe test the foods I’ve been craving, but know I won’t order out because I can make it WAY healthier at home. If you want a bagel, you NEED to try this recipe because it absolutely hits the spot!


Vegan, Gluten-free Everything Bagels
 
Prep time
Cook time
Total time
 
Serves: 6
Ingredients
Instructions
  1. Preheat oven to 350° F and line a baking sheet with parchment paper.
  2. Fill a large pot halfway up with water and bring to a boil. Once the water has come to a boil, reduce heat slightly to keep water at a gentle boil.
  3. Combine the almond flour, coconut flour, flaxseed, tapioca flour, baking powder and sea salt in a large bowl. Add ⅔ cup warm water, apple cider vinegar, and honey and mix (by hand) until a dough forms.
  4. Use wet hands and form dough into 6 balls. Flatten the balls and use your finger to create a hole in the middle to create the bagel shape. Place the bagels on the prepared baking sheet.
  5. Carefully drop 3 bagels in the boiling water until they float (about 30 seconds). Remove with slotted spoon and place them back on the baking sheet. Repeat until all bagels have been boiled. Bake the boiled bagels for 10 minutes.
  6. Remove bagels from oven, brush with olive oil or aquafaba, and sprinkle each bagel with everything but the bagel seasoning. Return bagels to the oven and cook an additional 15 minutes.
  7. Remove bagels once more, and carefully flip them over to make sure the bottom half cooks (should no longer be moist). Bake for an additional 5 minutes.
  8. Cool on a baking rack for 10 minutes and then serve with your favorite toppings! Last 2 weeks in the fridge and a few months in the freezer.
Notes
Inspired by this recipe simple healthy kitchen.


Hope you enjoy this bagel as much as I enjoyed recipe testing it! Continue to stay safe + healthy out there 🙂

With Health + Happiness Always,
Jax

PS – Craving structure and social community while also eating immunity boosting foods? My 12 Day Real Food Reboot launches this Monday, April 20th and there are only a handful of spots left. Click here to sign up and join the “little adapts” community!