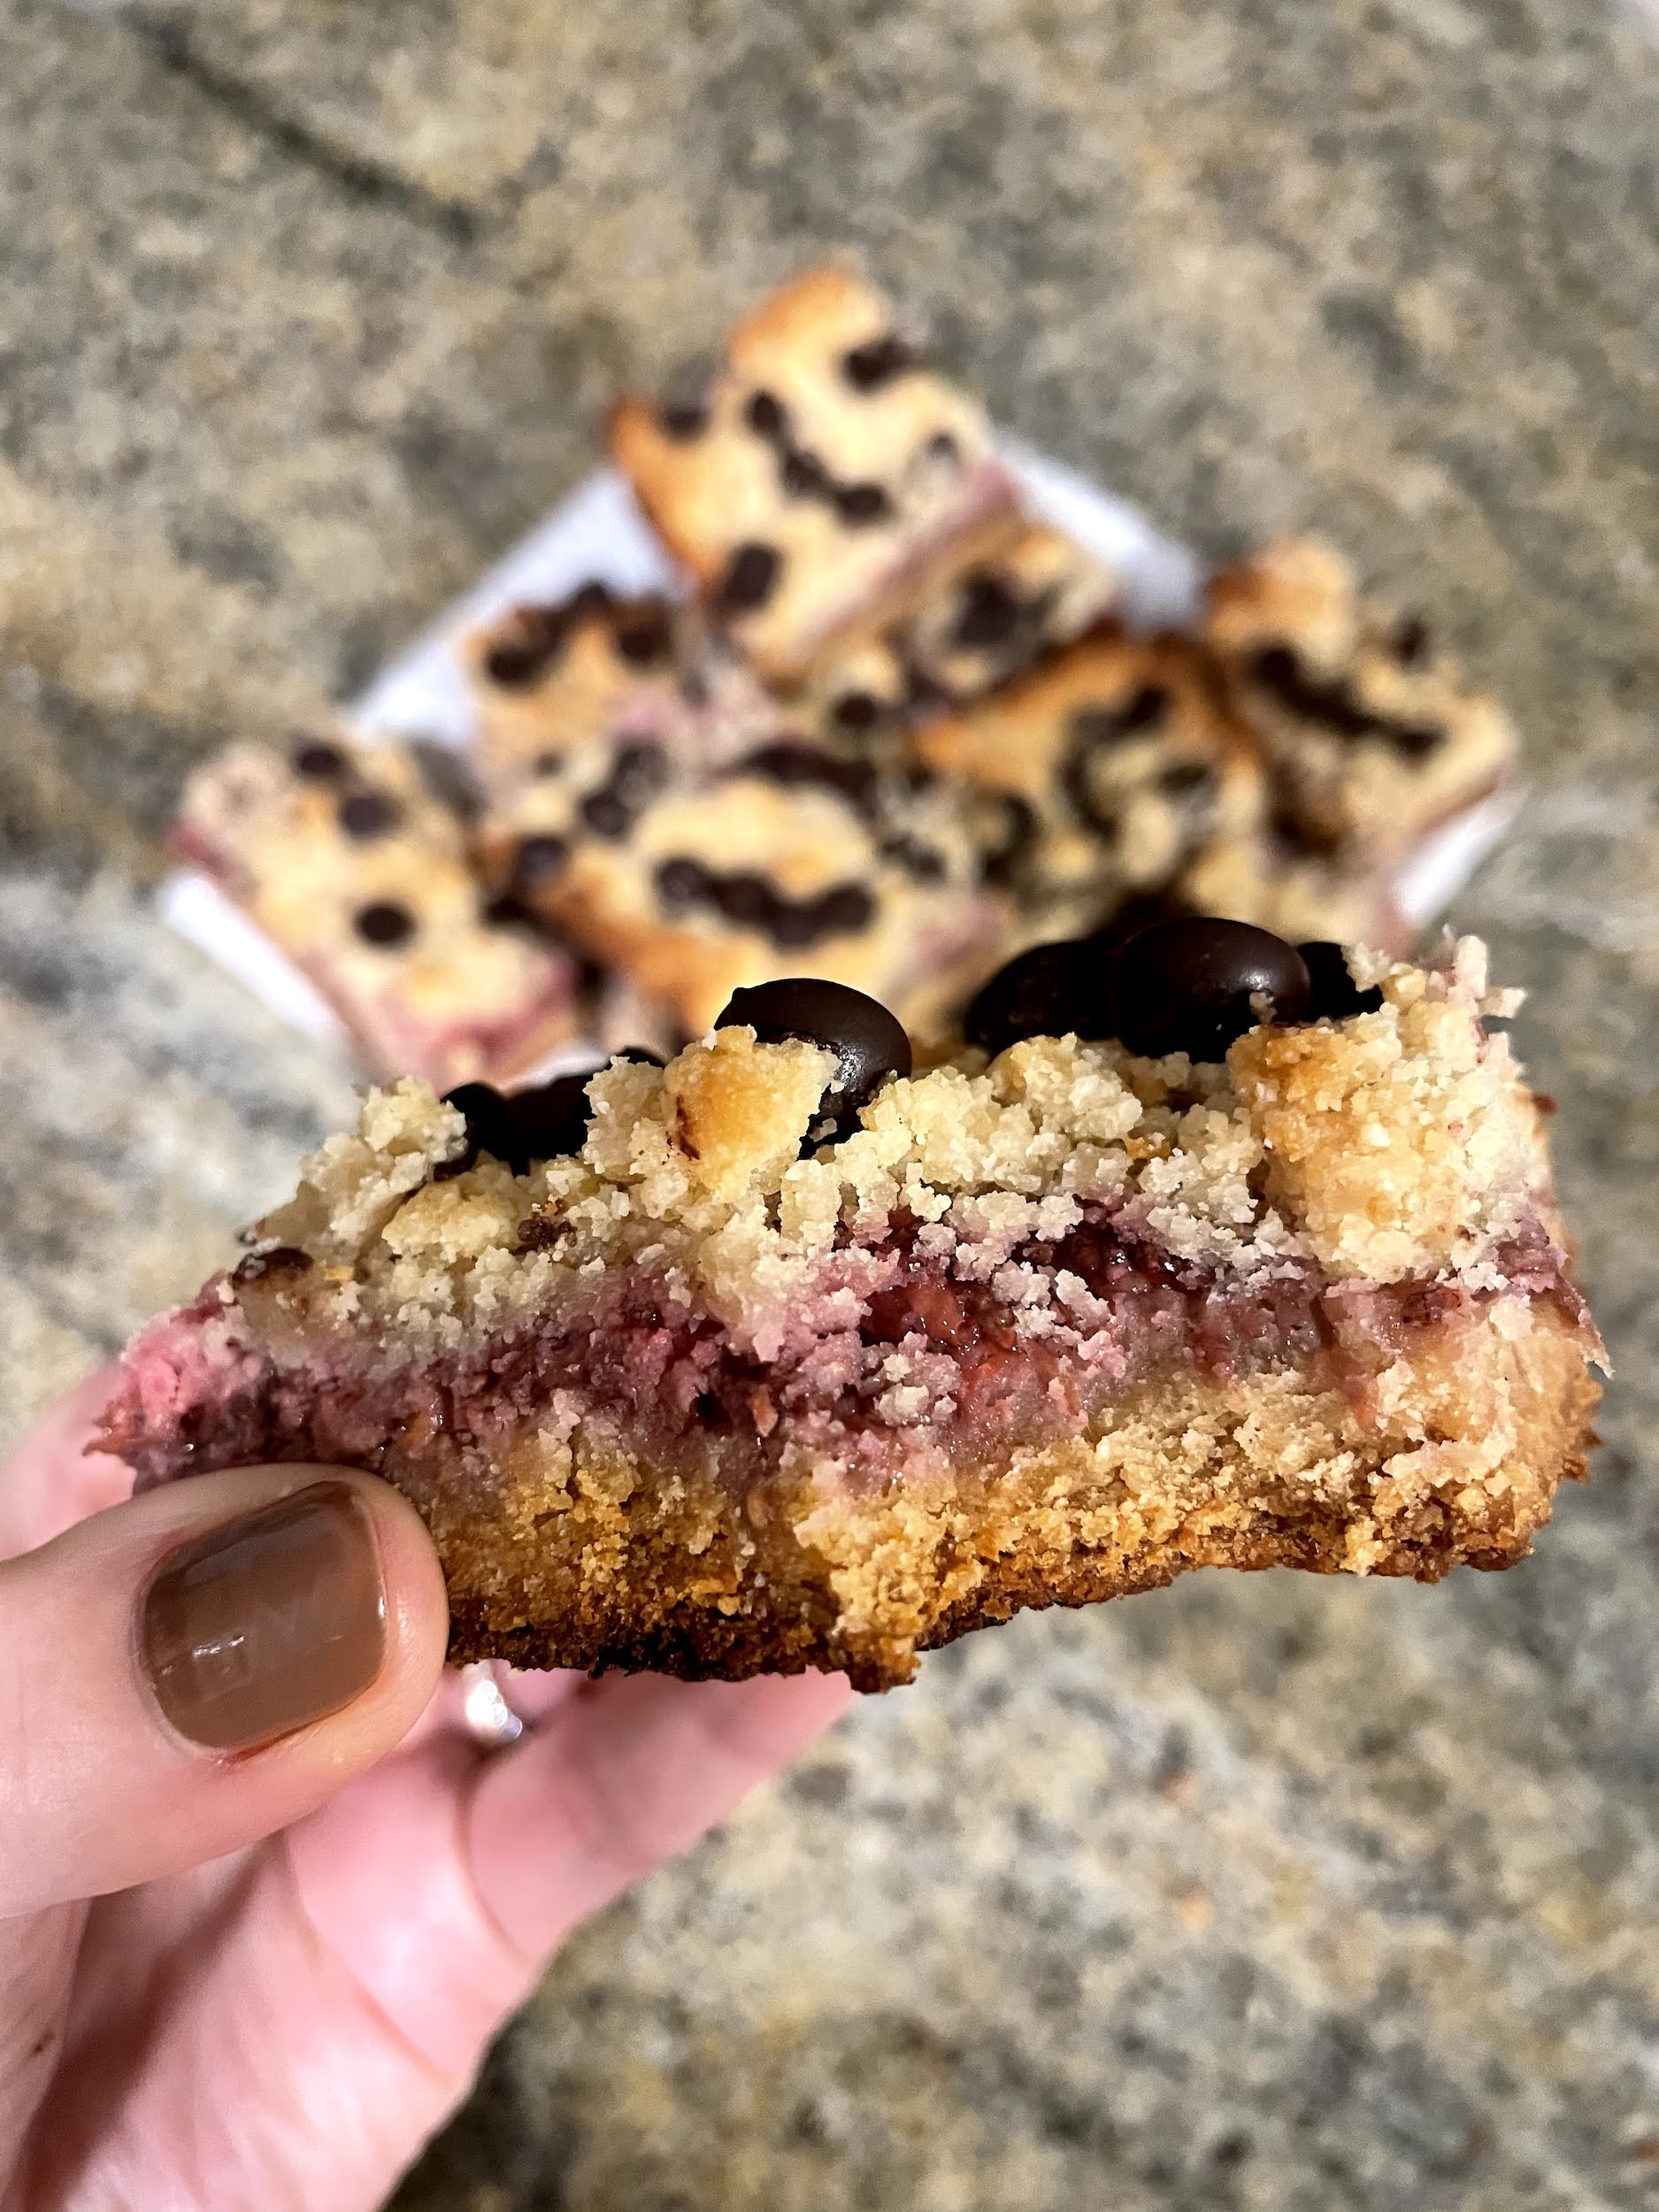
Coconut Whip Cream (V, DF, GF)

Not going to lie, but I’ve been eating a healthy dessert almost every night since I got pregnant! I recently wanted to have berries with coconut whip cream, but couldn’t get myself to buy the store bought brand because all of the extra ingredients. I knew that I had come across a recipe for coconut whip cream that only used a can of coconut cream so decided to give it a whirl and it was absolutely so easy and tasty! I knew I would love it because I already love when the coconut milk in my fridge hardens + becomes a thicker, yogurt like consistency. This surpassed by expectations and more and really couldn’t have been more simple!


Coconut Whip Cream (V, DF, GF, NF)
 
Prep time
Total time
 
Serves: 4-6 servings
Instructions
  1. Place the can of coconut cream for at least 30 minutes in the fridge (ideally longer is better to get create more coconut cream by solidifying the coconut!) I recommend doing this while you're making dinner so it's chilled by the time you're ready for dessert.
  2. Scoop out the solidified coconut cream out of the can and into a large bowl. Add 1 tbsp of coconut liquid from the can into the bowl and then you can keep the remaining liquid for smoothies.
  3. Add in 1 tsp of vanilla extract. (Option to add a splash of sweetener like stevia, monk fruit or coconut sugar but I loved it unsweetened!)
  4. Using a hand or standing mixer, mix the coconut mixture on low and slowly increase the speed until you fluffy whipped peaks start to form.
  5. Serve immediately with berries or your favorite dessert. Lasts for up to a week in the fridge.


This whip cream tastes like heaven – you’re welcome!

With Health + Happiness,
Jax

PS – Want more recipes for your favorite comfort foods?! Sign up for my Little Adapts By Jax App and get access to my Clean Comfort Cookbook + so much more!

5 Minute Vegan Brownie Mug Sundae

I’ve always had a sweet tooth (hello, dark chocolate!), but my healthy dessert game is strong right now because of my pregnancy. If I can’t enjoy a nice glass of French red, then I’m definitely going to have a post dinner dessert. As much as I try to buy healthy treats from a bakery or a store, I just can’t get myself to do it 99% of the time because:

  1. The ingredients aren’t up to my standards
  2. I know I can recreate it at home with a lot of love

While not every recipe comes out amazing the first time I make it, it truly brings me joy to create a healthy recipe that is made with nutrient dense ingredients, low in sugar + satisfies my sweet tooth. This brownie will make all of your dessert dreams come true!


5 Minute Vegan Brownie Mug Sundae
 
Prep time
Cook time
Total time
 
Serves: 1-2 servings
Ingredients
Instructions
  1. Mix dry ingredients (except chocolate chips) in a mug
  2. Add in wet ingredients and stir until well combined.
  3. Fold in the chocolate chips.
  4. Place in the microwave for 1 minute. Then continue to bake in the microwave for increments of 10 seconds until the brownies are set and a toothpick comes out clean. (I baked mine for 1 minute and 30 seconds but every microwave is different.)
  5. Let it cool for a few minutes and serve with vegan ice cream. Enjoy!


Enjoy this little piece of heaven!

With Health + Happiness Always,
Jax

PS – Want to learn about how to make healthy recipes like this at home and make it your default instead of forcing yourself to eat healthier? Check out my 6 Week Nutrition 101 Group Program launching on Monday, February 15th. Don’t wait as there are only 3 spots left!

Christmas Peppermint Truffles

It’s that time of year – peppermint time! I usually make peppermint bark but this year I decided I would make a new truffle recipe instead. These truffles are creamy on the inside with just the right amount of peppermint and sweetness. It’s a little bite of heaven, plus it’s packed with:

  • Healthy fat from avocado + nuts
  • Natural sugar from dates
  • Antioxidants from dark chocolate

Note: I wanted to make them more of a peppermint brownie truffle so I used pecans + walnuts, but you can totally use any raw nuts you have on hand and they will still be amazing!

Christmas Peppermint Truffles
 
Prep time
Total time
 
Serves: 15-17 truffles
Ingredients
Instructions
  1. Place walnuts, pecans, dates, almond milk, avocado, peppermint extract + cacao powder into a high speed blender or food processor.
  2. Pulse until ingredients are combined, but still have chunks and forms a dough. Place in a bowl covered in the fridge for 10 minutes so the dough is less sticky.
  3. Scoop out dough into a medium sized bowl and place parchment paper onto a small baking tray.
  4. Melt dark chocolate + coconut oil in the microwave - making sure to stir every 30 seconds or so to make sure the chocolate doesn't burn.
  5. While the chocolate is melting, finely dice the candy canes if you’re using them.
  6. Roll the dough into golf size balls or smaller and place on parchment paper.
  7. Then using 2 forks, place each ball into the melted chocolate (allow the chocolate to drip off the ball before placing back onto the parchment paper.)
  8. Sprinkle each truffle with crushed candy cane or white sprinkles.
  9. Place in the fridge for at least 30 minutes and enjoy! Keep in an airtight container in the fridge for up to 2 weeks.

Happy Holidays!

With Health + Happiness Always,
Jax

PS – Don’t forget to sign up for my NEW LITTLE ADAPTS BY JAX APP using code LAHOLIDAY to get 7 days FREE + 50% off the first 3 months ($9.98 instead of $19.97 per month!) Offer ends on December 31st.

Cozy, Healthy Hot Chocolate

I always loved hot chocolate as a kid, especially on a snow day in the winter! It reminds me of the bliss of being home from school and warming up after a long day of playing in the snow. Now that I’ve learned how to make homemade hot chocolate, the stuff I drank as a child doesn’t even compare. This recipe is packed with so much rich, chocolate flavor that you’ll never want to buy the store bought packets again 🙂

“Little Adapt”: Use 1/2 almond milk and 1/2 coconut milk. The coconut milk will give it a richer + creamier taste – trust me!

Cozy Healthy Hot Chocolate
 
Prep time
Cook time
Total time
 
Serves: 1
Ingredients
Instructions
  1. Pour dairy free milk into a small pot and start to heat on medium.
  2. After a few minutes, add in unsweetened cacao powder + coconut sugar (and raw cacao butter if using). Use a whisk to combine the ingredients as it continues to heat up until it is one consistent color and there is no clumps in the beverage. Feel free to taste test and add more cacao powder or coconut sugar if you want more sweetness or more chocolate flavor.
  3. Serve with marshmallows and enjoy!


Happy sippin’!

With Health + Happiness Always,
Jax

PS – I’m hosting a 12 Days of Christmas Challenge starting on Monday, December 14th on my new app! You can sign up here and use code “LAHOLIDAY” for 14 days free + 50% off your first 3 months!

Vegan Blueberry Banana Bread (Nut free!)

Happy Monday! One of my favorite ways to be creative in my business is recipe development, especially when it comes to treats. I never feel deprived or restricted because I love finding ways to make my favorite treats with healthier ingredients and less sugar. It’s a reminder that we can still satisfy our cravings with foods that taste amazing and also are good for our bodies! It’s such a fun challenge for me.

A new recent challenge is making my recipes nut-free as I have many friends and clients who have nut allergies. This has forced me to diversify the ingredients that I’m putting in my recipes, which has added a whole new texture and taste in a really great way. I love that this community is always helping me to continue to learn and grow so I can better support all of you on your healthy + happy journeys 🙂 PS – This banana bread has been taste tested by all of my siblings and they loved it!

Vegan Blueberry Banana Bread (Nut free!)
 
Prep time
Cook time
Total time
 
Serves: 6-8
Ingredients
  • 1¼ cup oat flour (1⅔ cup oats blended into flour)
  • ½ tsp sea salt
  • 1½ tsp baking powder
  • 1 tsp cinnamon
  • 3 mashed bananas
  • ¼ cup maple syrup
  • ¼ cup melted coconut oil
  • 1 tbsp vanilla extract
  • 4 flax eggs (4 tbsp ground flax seed + 6 tbsp water)
  • ⅓ cup frozen or fresh blueberries + handful for on top
  • Sprinkle of sunflower seeds or coconut on top
Instructions
  1. Preheat the oven to 325 degrees F.
  2. Mash bananas in a bowl and mix flax eggs in a small bowl.
  3. Add maple syrup, coconut oil + vanilla extract to mashed bananas + mix. Then add in flax eggs and mix again.
  4. Add in the dry ingredients and mix until well combined.
  5. Fold in the blueberries and line a bread pan with parchment paper.
  6. Pour batter into the pan and sprinkle with more blueberries and sunflower seeds or coconut.
  7. Bake for about 50 to 55 minutes. It should be ready when a toothpick comes out clean. Let it cool for 10 minutes, slice + enjoy!
  8. *Store in tin foil, unsliced in the refrigerator for up to 2 weeks.


With Health + Happiness Always,
Jax

PS – Want to learn how to add “little adapts” to your lifestyle? Click here to sign up for a FREE 7 day trial to my online membership!

Guiltless Apple Sundae

Have you heard of seasonal eating? It is the idea that we should eat what is in season because it supplies our bodies with exactly what it needs to thrive and feel more energized. It is also a great way to eat more tasty and nutrient dense foods that can have a lower impact on the planet and on your wallet since most of these foods are locally grown. For example, autumn is the season of harvest and the gathering of nature’s products in preparation for the season of rest, winter. You will see an abundance of foods like apples, pumpkins, squash, tomatoes, corn and brown rice at your local grocery store and farmer’s markets. These types of fuller, richer and more heat producing foods keep us warm through the chill of late autumn and into winter. Apples are also packed with fiber and pectic, which allows us to digest these heavier foods we’re eating to keep warm. Here are 4 “little adapts” to incorporate seasonal eating into your diet this fall:

  1. Buy 1 seasonal food each time you go grocery shopping
  • You will see a large selection of seasonal foods at the grocery store so each time you go, purchase a different one.
  1. Try a new seasonal recipe each week
  • It’s easier to incorporate seasonal foods if you have a recipe in mind.
  1. Get creative
  • Some of my favorite meals have been created by seemingly random food combinations.
  1. Listen to your body
  • The best part about eating seasonally is that your body is probably already craving these foods so just lean into it.

This guiltless apple sundae only takes 15 minutes to make!

Guiltless Apple Sundae
 
Prep time
Cook time
Total time
 
Author:
Serves: 2
Ingredients
Apple Base:
Toasted Oats:
Banana Nice Cream:
  • 2 frozen bananas
  • ⅛-1/4 cup of unsweetened non-dairy milk
  • *Note: You can sub with 1-2 scoops of vanilla vegan ice cream.
Instructions
  1. Preheat the oven to 350 degrees F.
  2. In a small bowl, add in oats, coconut oil + spices and stir until oats are well coated. Place on a small tray on parchment paper and make sure the oats are spread out so they bake faster. Then bake for about 10-15 minutes while you prep the apples and nice cream making sure to toss half way through.
  3. Heat a small pan on medium-low heat. Slice apple and use the same bowl as the oats. Add in coconut oil and cinnamon and toss until apples are well coated. Place apples in the pan and cook for about 5-7 minutes tossing occasionally. Turn down the heat to a simmer and cover the pan to cook for another 3-5 minutes.
  4. Place the oven on broil to crisp up the oats for 2 minutes (no longer than that or it will burn!) and take out of the oven to cool for a few minutes before serving.
  5. Place frozen bananas in the blender and add in ⅛ cup of non-dairy milk. Blend and if it’s still too thick, slowly add in the remaining ⅛ cup of non-dairy milk to get your desired texture. Less liquid makes it’s thicker and more like ice cream!
  6. Place apples, toasted oats + banana nice cream in a bowl and enjoy!


Happy guiltless indulging!

With Health + Happiness Always,

Jax

PS – Want to take your health + happiness to the next level? Join my online fitness + nutrition membership with a 7 day FREE trial to get started 🙂

Vegan Pumpkin Oatmeal Cookies

Happy Fall – it’s finally pumpkin season! I LOVE pumpkin season, but I’ve been known to overdue it with pumpkin everything so now I hold off until end of September and beginning of October, haha. Now that it’s here, I will be spending all week recipe testing new ones so let me know if there is anything you would like to see 🙂 In addition, pumpkins are super nutritious so here is why we should eat them while they are seasonally acceptable:

  • Packed with Vitamins A + C, which promote healthy eyes, skin + overall immunity
  • Nutrient dense, high in fiber + 94% water, which makes it low in calories, keeps you full + promotes weight loss
  • High in antioxidants, which lowers overall inflammation


Pumpkin Oatmeal Cookies
 
Prep time
Cook time
Total time
 
Serves: 20
Ingredients
Instructions
  1. Preheat the oven to 350 degrees F. Place the water + ground flax seed into a small bowl + whisk. Then let it sit for 5 minutes.
  2. In a large bowl, mix wet ingredients together: pumpkin, almond butter, vanilla extract, flax egg + maple syrup.
  3. Then add in oats, pumpkin pie spice, pumpkin seeds, and baking powder until well combined.
  4. Fold in cacao nibs or vegan dark chocolate chips.
  5. Using a spoon or ice cream scooper, place batter onto baking tray.
  6. Bake for about 15 to 17 minutes until edges are browned. Make sure to rotate trays halfway!
  7. Cool on baking rack for 10 minutes + enjoy! Keep in the fridge for up to 2 weeks.


Stay tuned for more pumpkin recipes!

With Health + Happiness Always,

Jax

Chocolate Coconut Chia Nice Cream

As you guys might know, I recently went to Thailand and am now OBSESSED with this coconut milk brand, Aroy-D coconut milk. It is the best coconut milk I have ever tasted as it’s creamy right out of the carton and doesn’t separate like the cans I’ve bought in the US. It is 100% made from coconut milk. It’s also super thick after it’s refrigerated, which is great to pour over granola as “yogurt” or to add to your desserts as “whip cream”. Lastly, I love using coconut milk in my tea lattes and smoothies. Here are the health benefits of coconut milk:

  • Healthy Fat (93% of its calories come from fat) – Important as it is the primary source of energy for the body and maintains body temperature. 
  • Manganese – Essential for nutrient absorption, production of digestive enzymes, bone development and immune system defenses.
  • Copper – Essential for the production of red blood cells, regulation of heart rate + blood pressure, absorption of iron, and activation of the immune system.
  • MagnesiumEssential for muscle contraction + relaxation. You are also depleted of it when you are stressed.
  • IronEssential for hemoglobin, which is the substance in your red blood cells that carries oxygen from your lungs to transport it throughout the body.

This is another recipe that was made by surprise. I was attempting to make chia pudding, but instead got this creamy bowl of goodness that was completely solid just like ice cream. The only difference was that I only needed to refrigerate it rather than freeze it. You can totally eat this for breakfast, but have found that 1 scoop with a few toppings is perfect for an after dinner dessert. *Note: You need to use the coconut milk mentioned above and in the recipe to get this consistency. I’ve made coconut milk chia pudding with cans from the US and it is chia pudding, not nice cream!


Chocolate Coconut Chia Nice Cream
 
Prep time
Total time
 
Serves: 3-4 servings
Ingredients
Instructions
  1. Pour coconut milk, chia seeds, unsweetened cacao powder, vanilla stevia + cinnamon into a medium bowl (preferably one that comes with a lid) and stir everything together with a whisk until well combined.
  2. Place into the fridge covered overnight or for 6 hours.
  3. Place 1 to 1.5 scoops into a small bowl and top with a drizzle of cold coconut milk or coconut cream from the box, drizzle of almond butter, sprinkle of shredded coconut + cacao nibs. Enjoy!


It legit tastes like heaven and it’s been on repeat this past week on the Reboot 🙂

With Health + Happiness Always,
Jax

PS – Interested in building a healthy lifestyle with easy, plant based recipes? Join me in my 6 Week Nutrition 101 Group Program launching on Monday, February 17th. Email me with questions!

Old Fashioned Gluten-Free Chocolate Chip Cookies

As I mentioned in another post, I recently went through all of my mom’s cookbooks to take my favorite childhood recipes and “little adapt” them. Today’s recipe is my mom’s famous chocolate chip cookies that I used to help her bake every Christmas. I didn’t want to change the recipe too much as the original recipe is amazing and because I wanted them to taste + feel like the real deal — especially if you are leaving them out for Santa! I used a gluten-free flour blend made mostly of brown rice flour for those that are gluten-free and also nut-free (but you can use regular or whole wheat flour if you don’t have a gluten allergy) and switched out sugar and brown sugar for coconut sugar (while also drastically decreasing the amount of sugar!) This recipe does contain eggs, but I will 100% be testing it with flax eggs in the future to make them vegan so stay tuned. Hope you add these to your holiday baking because they are the BEST! 

Old Fashioned Chocolate Chip Cookies
 
Prep time
Cook time
Total time
 
Author:
Serves: 32
Instructions
  1. Preheat the oven to 375 degrees F.
  2. In a large bowl, mix flour, sea salt and baking soda. Then set aside for later.
  3. In another bowl, mix shortening, coconut sugar and vanilla extract with your hands. Then beat in the eggs so they are combined.
  4. Then slowly start to add the dry mixture to the wet mixture by hand or with a beater.
  5. Fold in the dark chocolate chips.
  6. Using a tablespoon or ice cream scooper, scoop dough out on baking trays and press flat into a cookie shape.
  7. Bake for 15 to 17 minutes until the cookies start to brown on the edges.
  8. Place them on a cooling rack for 10 minutes. Then enjoy!


These are the perfect cookies to bring for dessert, give to relatives + friends, and leave for Santa. Happy Holidays, friends!

With Health + Happiness,
Jax

PS – If you missed my last Reboot and want to detox in the new year, sign up for my “12 Day Real Food Reboot” launching on Monday, January 13th by clicking here!

Ultimate “Little Adapts” Apple Crisp

When I think of Fall/Thanksgiving, I always think of my Momma’s apple crisp with vanilla ice cream 🙂 It was always everyone’s favorite + something we all looked forward to during apple season. I’ve decided I’m going to try to “little adapt” all of my Momma’s favorite recipes using healthier, mostly plant based ingredients so we can all continue to “indulge” without straying from our long-term wellness goals + having any guilt! First up, is my mom’s famous apple crisp + it tastes just as good as the original if not better. I topped it off with vanilla Oatly ice cream + it was dreamy. You can always do banana nice cream too, which is just as good. I dabbled with a few of her recipes last year, but I’m going to continue this through the new year so stay tuned.

*Note: This recipe is nut-free as I know quite a few people with nut allergies and wanted to make sure this recipe suited their dietary restrictions as well. There’s an alternative nut-free topping too or you can just leave it out all together!


Ultimate "Little Adapts" Apple Crisp
 
Prep time
Cook time
Total time
 
Serves: 9
Ingredients
Apple + Crumb Mixture
Topping
Nut-free Topping
Instructions
  1. Preheat oven to 350 degrees F + grease a 9x9 square pan with coconut oil.
  2. Layer all of the sliced apples in the roasting pan (makes about 1 to 2 layers) + sprinkle with a little bit of cinnamon.
  3. In a large mixing bowl, mix together the flour, sugar, cinnamon + sea salt.
  4. Add vanilla extract + coconut oil using a mixer or by hand.
  5. Once fully blended, mix in ½ cup of oats + 2 tbsp of coconut flour by hand to thicken the dough.
  6. Spread crumb mixture evenly over the apples + seal edges.
  7. In the same mixing bowl, add pecans + walnuts (or oats if making the nut-free topping), maple syrup + vanilla extract and toss so well coated. Evenly sprinkle the nut mixture over the apple crisp.
  8. Bake for 1 hour.
  9. Cool until warm, not hot.
  10. Serve with regular or vegan vanilla ice cream. Enjoy!


Apple Layer

Crumb Layer

Nut Topping/Nut-free Topping

Hope you enjoy this as much as my family will on Thanksgiving! Don’t forget to share/tag me 🙂

With Health + Happiness Always,
Jax

PS – Stay tuned for my Black Friday Sale… It’s something I literally never offer so get excited!!!